

Doing it my way.
As I mentioned in a previous post, the rise of the decentralized social media network of users and servers known as Mastodon has been quite amazing.
Since Mastodon is at its core, wait.. that it does not have a core, it is a decentralized system, then it only seemed natural for me to try creating my own server. My son recently moved up from a 2008 iMac to a newer laptop, so I had a spare computer to try it on. Here goes.
This how-to will hopefully be useful whether you are installing a Mastodon instance on a machine at home, or hosted somewhere else, on an old Mac or PC or a shared server. If you see any omissions or want to suggest any corrections, please leave a comment.
The installation follows the basic instructions at docs.joinmastodon.org.
Live Threads
If you want to see the blow-by-blow process of making it happen I created two threads over two days. I’m using these as reference but if you want to see the step-by-step in a more complete way just skip down to the next section. Feel free to reply to and/or boost those threads too.
Day 1 Thread
Day 2 Thread
Part 1 – A suitable machine
Hardware: I used a 2009 21.5″ iMac with 4GB RAM a 1TB SATA HDD, and 3GHz Core2Duo Intel processor.
Update Sept 18, 2023: I have since upgraded the iMac with 16GB RAM, and a 1TB SSD drive. It is now running both Mastodon and a Pixelfed server among other services very nicely on a pure Debian install without using rEFInd or including a Mac partition at all.
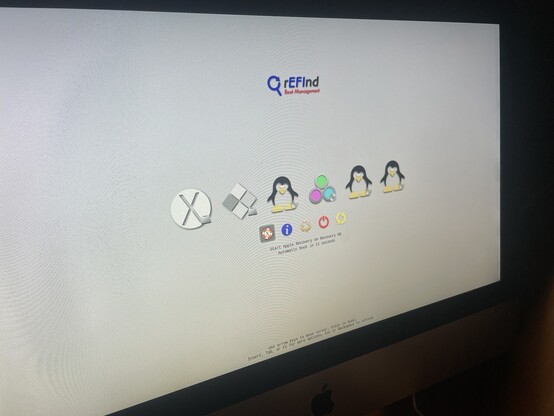
Software: I settled on Debian 11 “Bullseye”. I was going to use the recommended Linux distribution of Ubuntu but couldn’t get the dual booting to work correctly and install the system. I am dual booting it using rEFInd with macOS 10.13 High Sierra (the highest supported macOS version for this machine).
Storage: Mastodon will want to know if you are using local or cloud storage. I am using the local hard drive, partly because I wanted to see if the relatively slow (7200rpm) hard drive would be able to handle Mastodon. (it can). As I am dual booting the machine, I used Disk Utility to split the hard drive into 60/40 for Linux/macOS. I have dedicated 600GB to Debian/Mastodon and 400GB to macOS. If I need more storage in time I’ll simply plug more in and possibly upgrade the HDD to an SSD.
Network: I have the iMac plugged into my home Gigabit Ethernet network, there’s no reason you could not use a WIFI connection.
Installation Media: If you’re using an old iMac or computer with a CD/DVD drive, resist the urge to use optical media to install Linux. Use an SD Card or USB Stick instead. It is much much faster.
A Second Computer: You’ll likely want a 2nd computer to test from and potentially install from (see next) using SSH.
An Email Provider: My existing hosting provider give me access to an SMTP server by creating an email account. I created one without an actual web-inbox so I could just use it to login to SMTP and send emails.
Domain name: Likewise, my provider allows me to create DNS records so I created a record for my instance name: mstdn.chrisalemany.ca and pointed it to my home ip before starting. You could use DynDNS or other automatic IP for this as well.
Part 2 – Prepare for a command line SSH install
Due to what I believe are issues with the video drivers with Ubuntu not working the 2009 iMac, I decided to completely forgo a graphical user interface and instead created a command line install. I would recommend this anyway as it means all resources on your computer will go to the Mastodon instance.
Step 3 – DualBooting an iMac – The rEFInd Bootloader
Get familiar with turning Security Integrity Protection off and on. Turn if off before you install rEFInd and then turn it back on when you’re done.
I won’t go into detail on the process of installing rEFInd. It is very straightforward and after downloading the software for the webpage.
Note: Linux can step on the boot loader with Grub. You might need to redo these steps to turn off/on SIP and reinstall rEFInd after installing Linux.
Step 4 – Installing Debian
- Obtain Debian.
- Image the Debian 11 CD media (use dd!) onto an SD Card or USB stick.
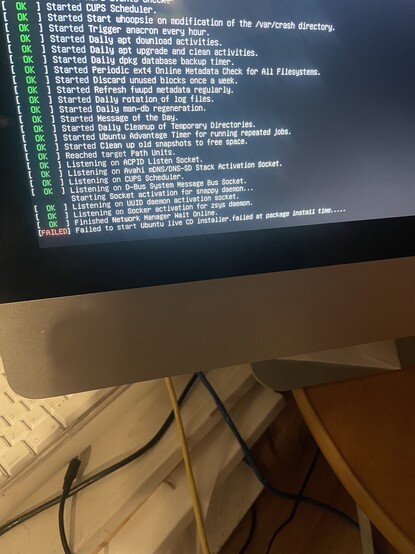
- Plug the Debian media into your iMac and boot to it!
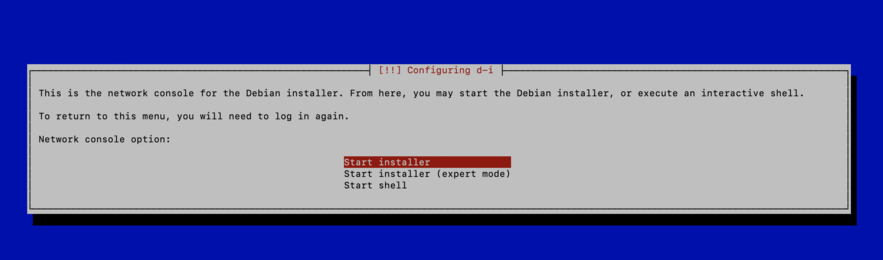
- Select the Expert Installation
- When asked, select a network-based install (SSH) if you want to continue from your remote computer. (You’ll need to know the IP of the computer of course)
- When presented with Hard Drive Partition questions create at least:
- One / mounted ext3 Linux partition (mine is 590GB)
- One Swap partition (mine is 10GB)
- Don’t touch the other partitions if you still want a working macOS partition 🙂
- When asked, for a software distribution protocol, be sure to select HTTP (not HTTPS!). You might save yourself some time with certificates and stuff. 🙂
- Configure the server as a Web Server (if you can choose nginx rather than Apache at this point, do it)
- You probably want to turn off the sleep and hibernate behaviour if this is going to be an always-on server:
systemctl mask sleep.target suspend.target hibernate.target hybrid_sleep.target
You should be left with a functional Debian 11 server. You can now boot into it, or connect from SSH, and start installing the packages you need for Mastodon.
Step 5 – Server access, Packages, Fail2Ban
Now that you have a running Debian 11 server, you should be able to start on the prerequisites as detailed in the documentation.
Some of what you see below will be the same as that “official webpage”.
- Create a password less access for yourself so you can connect to SSH using a public/private key. You should be able to login as root either directly or by su. Don’t continue before ensuring this is working.
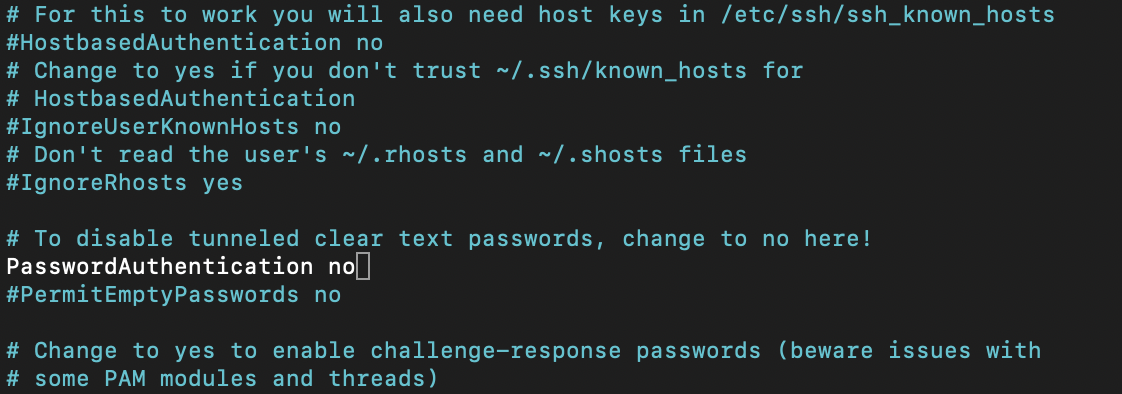
- Turn off username/password login
edit /etc/ssh/sshd_configfind PasswordAuthentication- uncomment it and set to
no - Restart SSH:
systemctl restart ssh.service
- If you haven’t already, make sure your main user can use sudo to run commands as root. Modify the /etc/sudoers files.
- That said, you’ll want to run all of this logged in as root
- Remove Apache if it is installed.
apt uninstall apache
- Update System Packages:
apt update && apt upgrade -y
- Install fail2ban
apt install fail2ban
- Edit /etc/fail2ban/jail.local
[DEFAULT]
destemail = your@email.here
sendername = Fail2Ban
[sshd]
enabled = true
port = 22
[sshd-ddos]
enabled = true
port = 22
- Restart fail2ban:
systemctl restart fail2ban
Step 6 – Firewall
You want/need a firewall – make sure to *decline* current rules if asked in the install.
- run command:
apt install -y iptables-persistent
- Edit /etc/iptables/rules.v4 to include:
*filter

#  Allow all loopback (lo0) traffic and drop all traffic to 127/8 that doesn't use lo0
-A INPUT -i lo -j ACCEPT
-A INPUT ! -i lo -d 127.0.0.0/8 -j REJECT

#  Accept all established inbound connections
-A INPUT -m state --state ESTABLISHED,RELATED -j ACCEPT

#  Allow all outbound traffic - you can modify this to only allow certain traffic
-A OUTPUT -j ACCEPT

#  Allow HTTP and HTTPS connections from anywhere (the normal ports for websites and SSL).
-A INPUT -p tcp --dport 80 -j ACCEPT
-A INPUT -p tcp --dport 443 -j ACCEPT

#  Allow SSH connections
#  The -dport number should be the same port number you set in sshd_config
-A INPUT -p tcp -m state --state NEW --dport 22 -j ACCEPT

#  Allow ping
-A INPUT -p icmp -m icmp --icmp-type 8 -j ACCEPT

# Allow destination unreachable messages, especially code 4 (fragmentation required) is required or PMTUD breaks
-A INPUT -p icmp -m icmp --icmp-type 3 -j ACCEPT

#  Log iptables denied calls
-A INPUT -m limit --limit 5/min -j LOG --log-prefix "iptables denied: " --log-level 7

#  Reject all other inbound - default deny unless explicitly allowed policy
-A INPUT -j REJECT
-A FORWARD -j REJECT

COMMIT- Load the rules:
iptables-restore < /etc/iptables/rules.v4- Note: If you’re having trouble finding iptables-restore try:
/usr/sbin/iptables-restore < /etc/iptables/rules.v4- and then see if you need to fix your PATH. I did.
- Your server will also have ipv6 so edit /etc/iptables/rules.v6 with:
*filter

#  Allow all loopback (lo0) traffic and drop all traffic to 127/8 that doesn't use lo0
-A INPUT -i lo -j ACCEPT
-A INPUT ! -i lo -d ::1/128 -j REJECT

#  Accept all established inbound connections
-A INPUT -m state --state ESTABLISHED,RELATED -j ACCEPT

#  Allow all outbound traffic - you can modify this to only allow certain traffic
-A OUTPUT -j ACCEPT

#  Allow HTTP and HTTPS connections from anywhere (the normal ports for websites and SSL).
-A INPUT -p tcp --dport 80 -j ACCEPT
-A INPUT -p tcp --dport 443 -j ACCEPT

#  Allow SSH connections
#  The -dport number should be the same port number you set in sshd_config
-A INPUT -p tcp -m state --state NEW --dport 22 -j ACCEPT

#  Allow ping
-A INPUT -p icmpv6 -j ACCEPT

#  Log iptables denied calls
-A INPUT -m limit --limit 5/min -j LOG --log-prefix "iptables denied: " --log-level 7

#  Reject all other inbound - default deny unless explicitly allowed policy
-A INPUT -j REJECT
-A FORWARD -j REJECT

COMMIT- Reload the rules again:
ip6tables-restore < /etc/iptables/rules.v6
Step 7 – Installing Mastodon from Source
Again, I followed the steps at joinmastodon.org, which were very good but I did have a few hiccups.
- Get the basic software you need first.
apt install -y curl wget gnupg apt-transport-https lsb-release ca-certificates
- Get Node.js
curl -sL https://deb.nodesource.com/setup_16.x | bash -
- Get the keys for PostgreSQL
wget -O /usr/share/keyrings/postgresql.asc https://www.postgresql.org/media/keys/ACCC4CF8.asc
- Set them up:
echo "deb [signed-by=/usr/share/keyrings/postgresql.asc] http://apt.postgresql.org/pub/repos/apt $(lsb_release -cs)-pgdg main" > /etc/apt/sources.list.d/postgresql.list
- Update your distribution packages
apt update
- Now install all the prerequisite software. It will take awhile.
apt install -y \
  imagemagick ffmpeg libpq-dev libxml2-dev libxslt1-dev file git-core \
  g++ libprotobuf-dev protobuf-compiler pkg-config nodejs gcc autoconf \
  bison build-essential libssl-dev libyaml-dev libreadline6-dev \
  zlib1g-dev libncurses5-dev libffi-dev libgdbm-dev \
  nginx redis-server redis-tools postgresql postgresql-contrib \
certbot python3-certbot-nginx libidn11-dev libicu-dev libjemalloc-dev- Install Yarn
corepack enableyarn set version classic
- Create a new user (to run Ruby and all of Mastodon really)
adduser --disabled-login mastodon
- Now you can switch to the mastodon user and continue
su - mastodon
- Install RBEnv and -build. This will be the longest process of the whole thing.
git clone https://github.com/rbenv/rbenv.git ~/.rbenv
cd ~/.rbenv && src/configure && make -C src
echo 'export PATH="$HOME/.rbenv/bin:$PATH"' >> ~/.bashrc
echo 'eval "$(rbenv init -)"' >> ~/.bashrc
exec bash
git clone https://github.com/rbenv/ruby-build.git ~/.rbenv/plugins/ruby-build- Install Ruby:
RUBY_CONFIGURE_OPTS=--with-jemalloc rbenv install 3.0.4rbenv global 3.0.4
- Install bundler in Ruby
gem install bundler --no-document
- You can go back to the root user!
- exit
- IMPORTANT: I found that my install had already installed mysql and it was conflicting with some parts of the installation, so I removed mySQL and made sure PostgreSQL was installed:
systemctl stop mysqlapt remove mysqlapt install postgresql- use “ident” authentication during the setup
echo "deb [signed-by=/usr/share/keyrings/postgresql.asc] http://apt.postgresql.org/pub/repos/apt $(lsb_release -cs)-pgdg main" > /etc/apt/sources.list.d/postgresql.list
- Get a configuration for PostgreSQL
- Go to https://pgtune.leopard.in.ua/#/
- Use it to tweak the /etc/postgresql/15/main/postgresql.conf file
- Create a user for PostgreSQL
sudo -u postgres psql
- In the SQL prompt execute:
- CREATE USER mastodon CREATEDB;
- \q
- Restart PostgreSQL:
systemctl restart postgresql
- You’re done with installs! You’re close now!
Step 8 – Setting up Mastodon for the First Time
You’re getting there now. You should have a running nginx and postgresql server just waiting for Mastodon to be created!
First, Go back into your mastodon user:
su - mastodon- check out the code:
git clone https://github.com/mastodon/mastodon.git live && cd livegit checkout $(git tag -l | grep -v 'rc[0-9]*$' | sort -V | tail -n 1)
- Install final dependancies
bundle config deployment 'true'bundle config without 'development test'bundle install -j$(getconf _NPROCESSORS_ONLN)yarn install --pure-lockfile
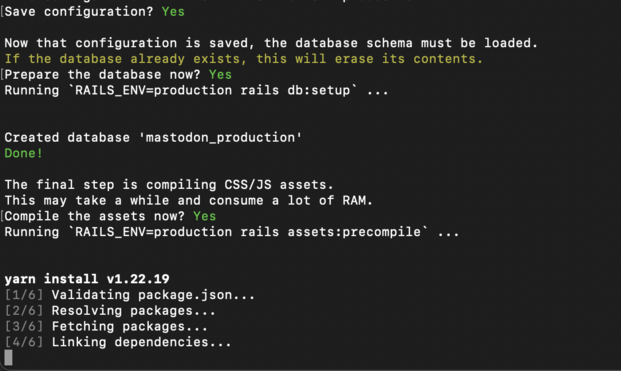
- You’re now ready to create a configuration for Mastodon and set it up. Make sure you have your domain name and email server credentials and SMTP setup handy so you can interact with the setup script.
- The script below can be used after install to check on things like if your email server is working properly.
NOTE: if you have trouble getting SMTP working and it doesn’t send a test email you can continue without it.RAILS_ENV=production bundle exec rake mastodon:setup
- Once finished you will have created your ~/live/.env.production file which is the basic file that tells Mastodon how to operate.
- If you had problems setting up SMTP and it would not send a test email using SSL, try these settings in your .env.production file:
SMTP_SERVER=mymailserver
SMTP_PORT=465
SMTP_LOGIN=myloginemail
SMTP_PASSWORD=mypassword
#SMTP_AUTH_METHOD=plain
#SMTP_OPENSSL_VERIFY_MODE=client_once
#SMTP_ENABLE_STARTTLS=always
SMTP_TLS=true
SMTP_FROM_ADDRESS=notifications@emailaddress
This has been submitted as a bug report to mastodon so hopefully this step becomes unnecessary.
- Exit back to the root user
- exit
Step 9 – Set up NGinx
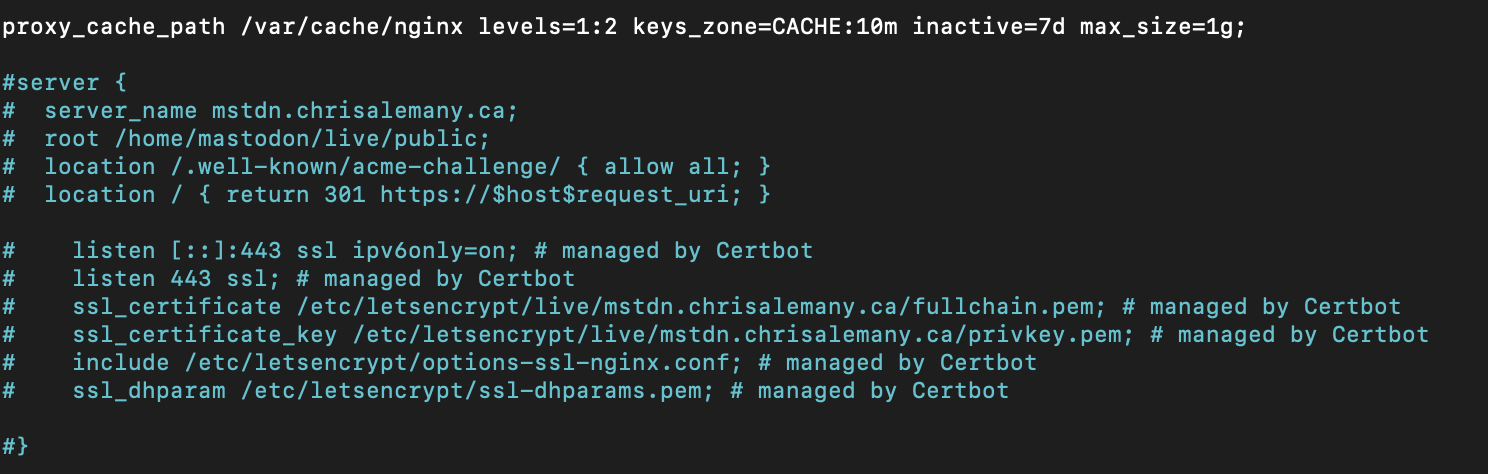
Mastodon has its own nginx configuration file.
- Copy the mastodon file over to the mastodon site settings in Nginx’s folders.
cp /home/mastodon/live/dist/nginx.conf /etc/nginx/sites-available/mastodon
- Link the available and enabled files.
ln -s /etc/nginx/sites-available/mastodon /etc/nginx/sites-enabled/mastodon
- Edit /etc/nginx/sites-available/mastodon and replace any instances of “example.com” with your own domain address. There may be other small configuration settings you will want to tweak.
- Restart/Reload Nginx
systemctl reload nginx
- You can run this to make sure NGinx (or any service) is running, it should say “active” in green.
systemctl status nginx.service
- Get SSL working. You will need a certificate. You can generate it like this, again use your own domain name:
certbot --nginx -d example.com- If it doesn’t work due to paths or other reasons, I actually used this command to be more specific about where to put the files:
certbot certonly --nginx --nginx-ctl nginx -d example.com
NOTE, I had trouble getting the SSL certificate to work with the certbot command. certbot kept modifying the NGinx .conf file needlessly. So I commented out the part that Certbot inserted and then everything worked!
Step 10 – Start it up – Updated 2023!
- Get everything started! Create the systemd scripts
cp /home/mastodon/live/dist/mastodon-*.service /etc/systemd/system/
- If you deviated from the defaults (I did not), check that the usernames and paths are correct here.
$EDITOR /etc/systemd/system/mastodon-*.service
- UPDATE NOVEMBER 2023 – Splitting Sidekiq Services
- I am adding to this in order to pass along some things I’ve learned after 10 months hosting the server. The default instructions create 3 main mastodon related services, mastodon-web, mastodon-sidekiq and mastodon-streaming. We’re going to make more for sidekiq
- Duplicate the mastodon-sidekiq service file according to the number of cores on your machine plus one. One file will take on the mailers and scheduler. (There must never be more than one scheduler service). The other files will share the load of the other 4 queues in Sidekiq, default, ingress, push, and pull.
- To make it a little easier to see, I changed the names of the files according to what they were doing so th 3 files I created for the iMac (with its 2 core Intel CPU) are:
/etc/systemd/system/mastodon-sidekiq-default-ingress-push-pull-1.service/etc/systemd/system/mastodon-sidekiq-default-ingress-push-pull-2.service/etc/systemd/system/mastodon-sidekiq-mailers-scheduler.service
- In each one we will modify the ExecStart variable so that they start specific queues and split the original 25 threads down to 10, 10 and 5.
- For both the mastodon-sidekiq-default*-1 and -2 service files use:
ExecStart=/home/mastodon/.rbenv/shims/bundle exec sidekiq -q default -q ingress -q push -q pull -c 10
- For mastodon-sidekiq-mailers-scheduler.service use:
ExecStart=/home/mastodon/.rbenv/shims/bundle exec sidekiq -q mailers -q scheduler -c 5
- For both the mastodon-sidekiq-default*-1 and -2 service files use:
- That’s it! start and enable the services!
systemctl daemon-reloadsystemctl enable --now mastodon-*
You should now be able to go to your domain name of your computer in a browser and see Mastodon whale!!
NOTE: If you are doing this all at home, behind your Internet Service Providers NAT firewall (ie. your server and your own devices have a local 192.16.8.x.x type of address) then you will NOT be able to browser to your web server from behind the same firewall.
The easiest thing to do is to see if you can access your mastodon address from a device on Cell/Data network so you know you are *outside* your home network.
That’s it! You should probably send an excited #selfhosted toot from your new instance!
If you ever want to restart your mastodon server you need to restart its three processes:
- systemctl restart mastodon-web
- systemctl restart mastodon-streaming
- systemctl restart mastodon-sidekiq
Viewing Your #selfhosted server from within your home network.
While you may have Mastodon working, if you have the server and yourself hosted at home behind a standard ISP router, you probably can’t access your Mastodon server while on your own WIFI or network! Annoying right? 🙂
This is due to the NAT on your firewall not allowing you to loop back to your own machine with an outside ‘looking’ address.
Here are some ways you can fix this. The options are listed in order of easy to hard/unreliable/annoying.
- Enable “NAT Loopback” (often not available but will solve the issue permanently.
- Add DNS to your own mastodon server (or other server) and add that to your ISP router DNS settings for clients. (some ISPs will not allow you to do this either, see below)
How to setup your own DNS server.
It’s pretty easy! Considering you just setup mastodon, this will feel pretty simple.
As Root user or sudo
- Install dnsmasq
apt-get install dnsmasq
- Configure it:
edit /etc/dnsmasq.conf
- You’ll only need to make a couple entries. We’re not going to use it to replace your ISP router, just run it so the server is available.
server=8.8.8.8
server=4.4.4.4

cache-size=1000
- Now make sure your /etc/hosts file has your local address and your domain name as the last entry.
- your.local.server.ip your.mastodon.domain.name yourserverhostname
- Finally, you need to open the DNS ports on your firewall so edit /etc/iptables/rules.v4 and add:
- -A INPUT -p tcp –dport 53 -j ACCEPT
- -A INPUT -p udp –dport 53 -j ACCEPT
- Reload those rules:
iptables-restore < /etc/iptables/rules.v4
- Restart dnsmasq just to be sure you’re done.
systemctl restart dnsmasq
To be able to use your new DNS server, you’ll need to add the (local) IP Address of your server to your ISP’s router DNS settings alongside the regular addresses.
If your ISP (like mine, TELUS) does not allow you to change the router’s DNS settings then you will need to add your home DNS server IP address to any device that wants access to mastodon on your home.
IMPORTANT: I found mobile devices (iPhone Mini running iOS 16) can have both the local and regular DNS addresses in their settings and it will always work from anywhere. However, my laptop (macOS 13.1) cannot have both automatically, so I have to remove the local DNS setting when I am not at home.
That’s all! I hope you have fun with your new Mastodon instance. Make sure you do a great introductory post and boost it widely so you can get federated. You’ll be surprised at the greetings. 🙂
Turning off the iMac screen
It took me more than a year but I finally got around to troubleshooting how to turn off the screen on the iMac.
The easiest thing to do is set the quiet console blank option in grub.
Go to: /etc/default/grub and set the lines as follows:
GRUB_CMDLINE_LINUX_DEFAULT="quiet consoleblank=60"
GRUB_CMDLINE_LINUX="quiet consoleblank=60”
Make sure you run ‘update-grub’ after saving your changes and then reboot the machine.