
This is a short post mostly to act as a resource for other owners of Stirling or Marathon brand trailers. These trailers are made by Westbrook Greenhouse Industries out of Ontario, Canada and can be found at Canadian Tire, Rona, Home Hardware and Home Depot under either the Stirling or Marathon names.
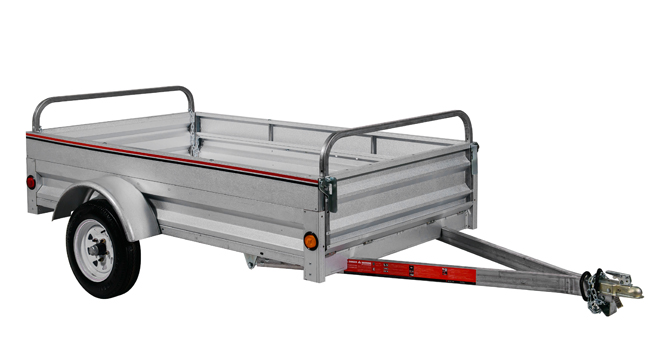
I have the 5×7 box utility trailer with the matching low bars on each end similar to the picture below. I bought it in the middle of the pandemic in summer 2020! (To facilitate the #PandemicPond, but perhaps that is future post).
Better than a Tarp
If you’re looking for something more “skookum” and perhaps more aesthetically pleasing than a regular tarp to cover your trailer I found a place called heavydutytarps.ca that’s worth a look. They’re also in Ontario and have very reasonable costs and rates.
They will create you a custom tarp to your specifications including colour, thickness of material, and types of fasteners. I ordered one this month and just received it and it’s good enough that I’m writing this post to recommend it to others and share the design.
Maybe sharing the plans below will save someone else the time of measuring… but I *always* recommend checking measurements and I won’t be help liable if your cover doesn’t fit after using the design below.
But like I said, hopefully the info below helps:
The Design
I sent them a hand drawn layout of the measurements needed to get the tarp to fit the box and also go under the bars nicely. They sent back this properly detailed drawing. Feel free to use this as a starting point. Clicking this link will download a PDF version.
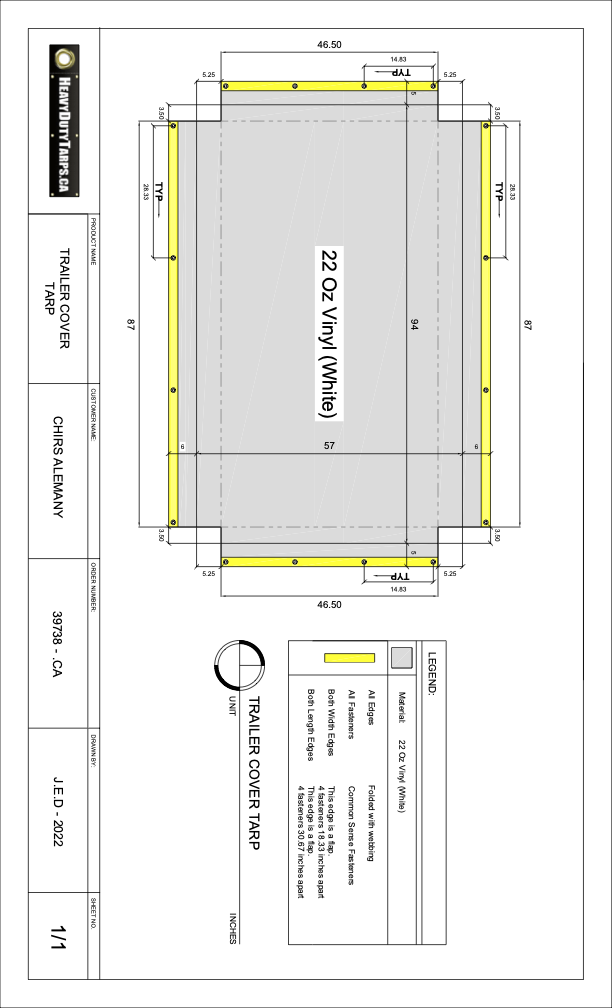
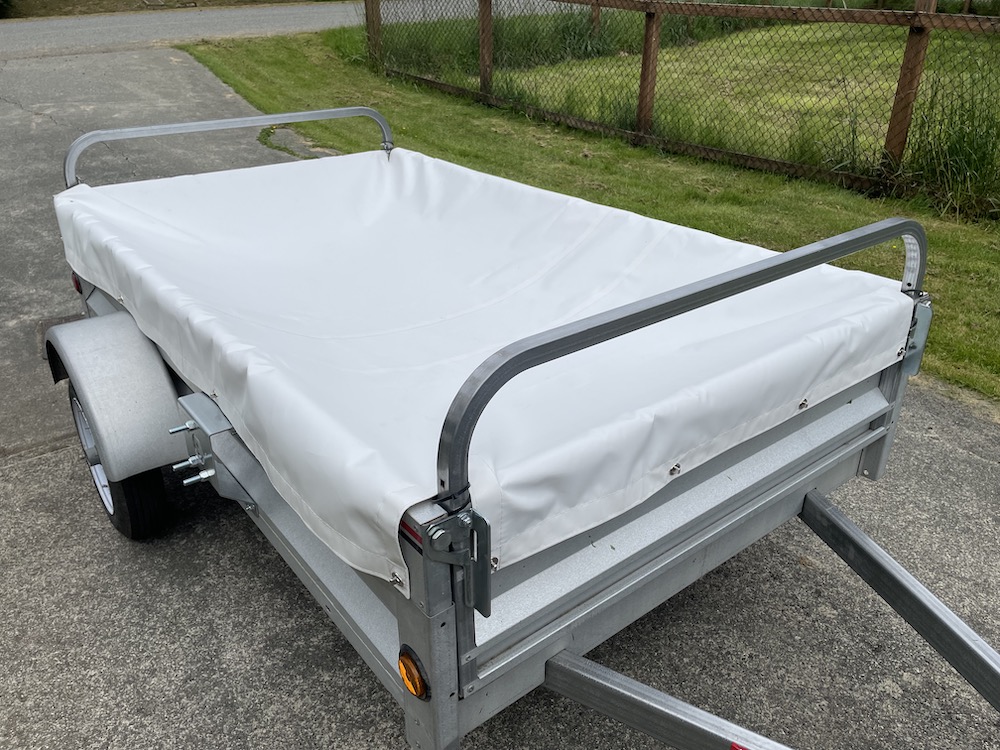
As you see from the specs, It’s a 94×57 cover with 6 inch flaps on the long sides and 5 inch flaps on the ends. The material is 22oz vinyl which has more of a thick marine cover feel than a tarp but is still light and can be folded nicely. The whole thing is about 9lbs.
NOTE: I would recommend 6 fasteners on the long sides rather than 4. While I’m very happy with what I have, I thought 4 would be more than enough, but see now 6 would have easily fit.
If you’ve done your own measuring you’ll also notice the measurements are a few inches larger in total width and length than the box. This was done on purpose to allow for some “bulge” in the trailer load.
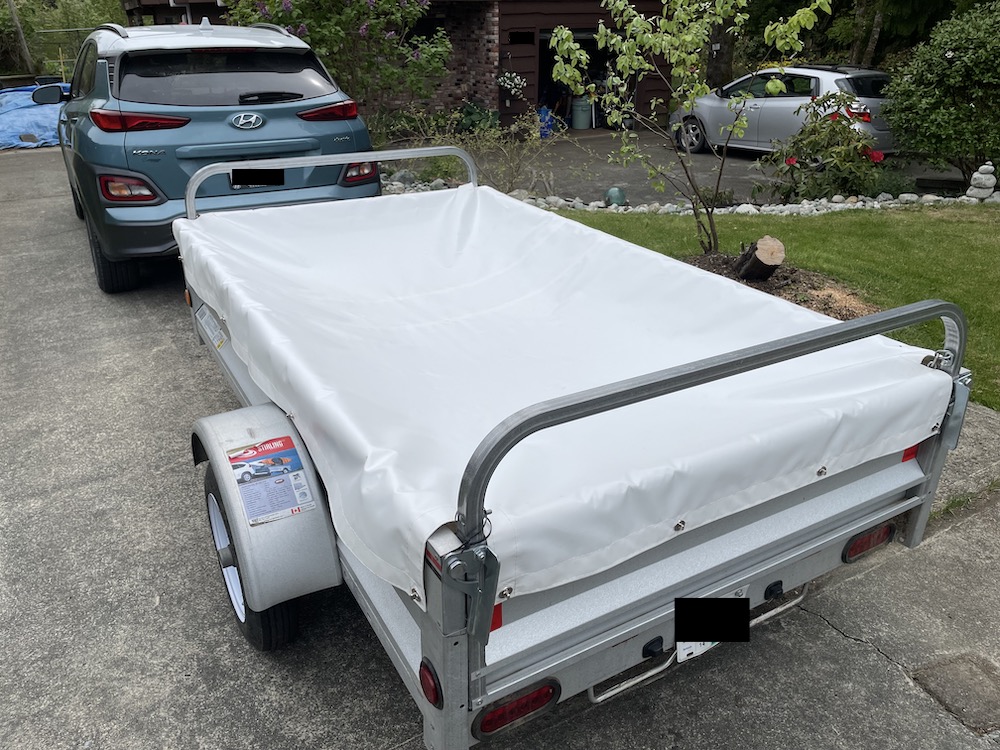
How it looks/works:
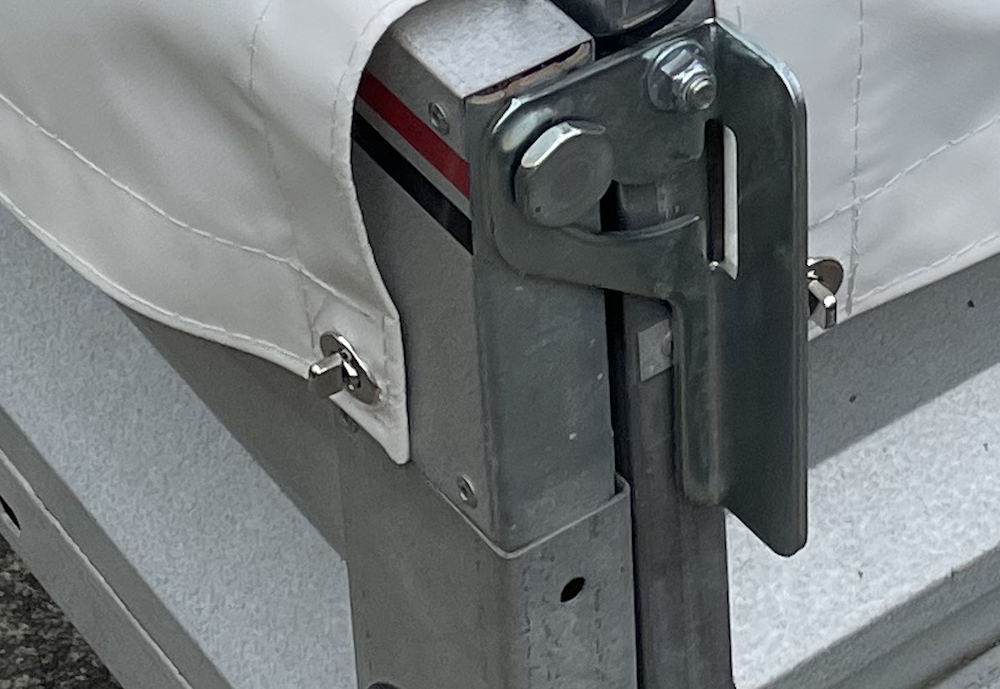
I used the marine style “common sense” fasteners (also known as turn-button). They’re easy to secure and should be able to withstand the wind at highway speeds.
The fastening points (which you are provided with and have to install, of course) are meant to be on the first ridge down from the top on the end ramp doors and along the first seam on the sides. It worked marvellously and following the seam made it easy to make sure I installed the backing for the fasteners along a level line.
Note when installing the fastening points: Use a 1/16th or smaller drill bit to make the hole as the provided screws are only barely sharp enough to make a hole themselves. I may swap these later for a nut/bolt arrangement so there isn’t a sharp point on the inside of the trailer though most are out of reach.
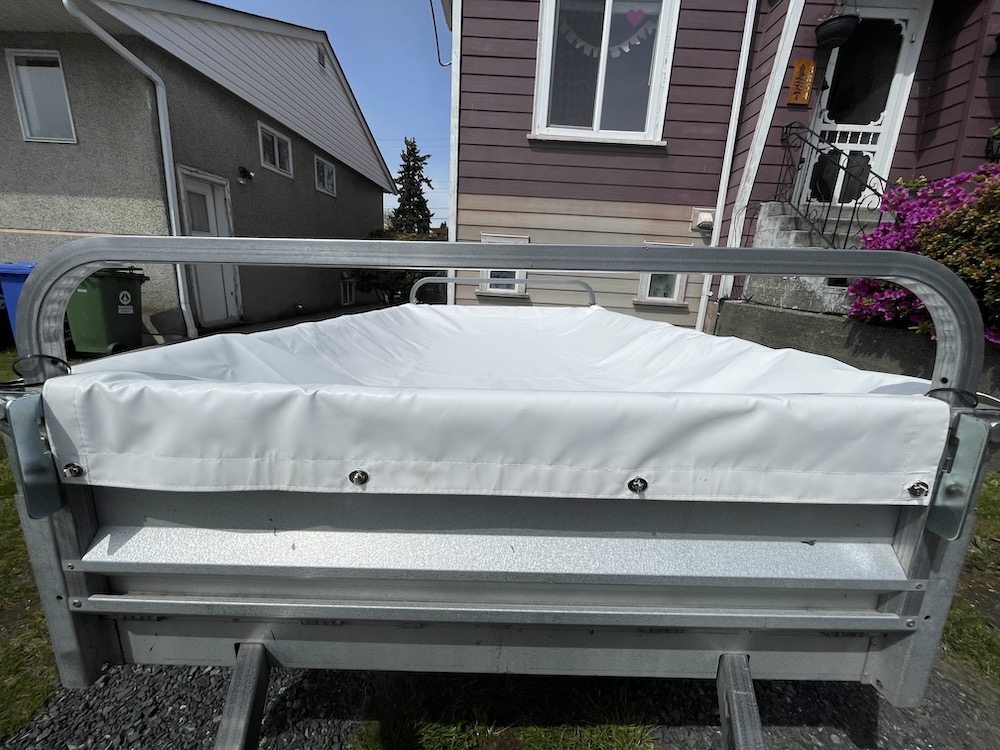
The finished product looks like this:
Total cost: $433.27+tax. Shipping was free to BC from Ontario. If you have any thoughts or questions, don’t hesitate to pop them in the comments.