

Updated – New Power Controller
A week after my electrician friend and I installed the wiring harness and a few days after getting a new trailer, something went bad in the controller that required it to be replaced. I have added what I did to diagnose and eventually replace the power controller with a Tekonsha ZCI [Zero Contact Interface] controller, to the bottom of this article. The basic procedure doesn’t change and I suspect I just got a bad controller. But check out the update for troubleshooting tips and possible better ways to do the install.
Not Recommended
If you’ve googled and forum’ed and scrolled enough to find yourself here, you already know this. But I’ll repeat it just to cover my own butt. 🙂 Towing is not recommend by Hyundai for the 2019 Hyundai Kona Electric. There are no load ratings or other indicators. You’re on your own.
Everything beyond this point is at your own risk.
But it can certainly be done!
I am no car mechanic. Note that this how-to will mostly be about the wiring. I got the hitch done by a local business.
I have friends and know businesses who know what they’re doing and are more competent than me. If you’re not comfortable doing your own stuff here is a comforting bit of experience:
It’s not as bad as you think, but it’s still good to have help.
If you know someone who installs a lot of hitches into vehicles, you’re going to be fine!
If you know someone who has done some wiring of cars and knows their way around a 12V tester (the kind with a screwdriver like point on one end, a light in the handle, and a grounding wire), you’re going to be fine!
If you know someone who can do both of those things at the same time, fantastic! Read on.
The wiring took a friend and I an entire afternoon. Hopefully if this tutorial saves you some hunting, you’ll maybe get it done a little quicker, but as with all things, patience and deliberate-ness pays off. Have fun.
The easy part: The Hitch
This part has been solved by many people online so I am not going to go too deeply into it except to say that the business I took it to does a lot of hitches and other customizations to cars and trucks. When I said that there was not a hitch specifically designed for the 2019 Kona Electric and that towing was not “recommended” they responded with; we do ‘not recommended’ stuff all the time, that’s what ‘custom’ means. 🙂 I like these people.
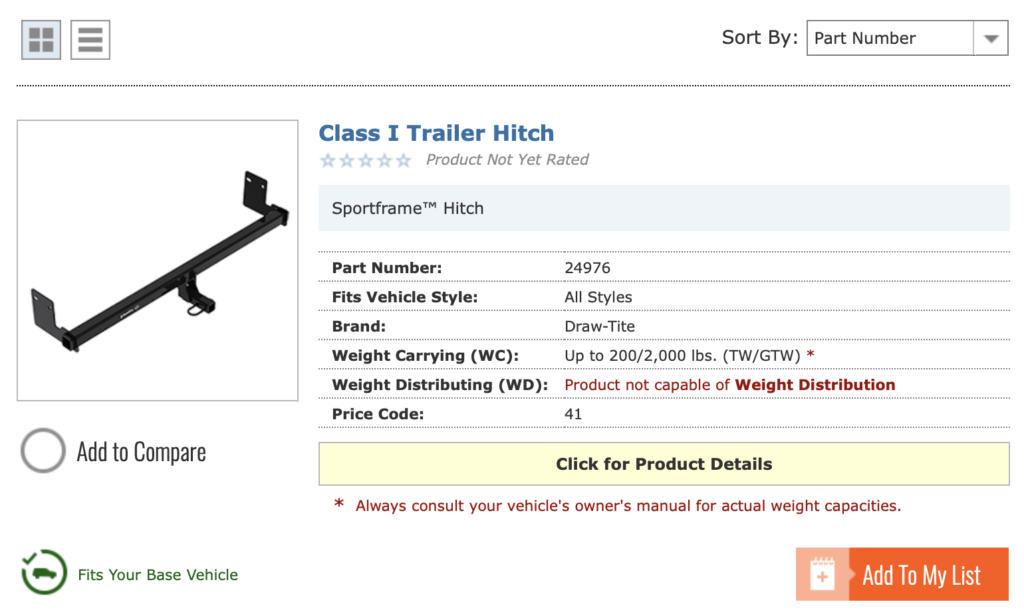
To be sure, according to everything I could find on the web, I can’t install anything more than a Class I (GVWR 2000lbs/900kg) hitch.
They installed a Draw-Tite 24976. They reported that it took a little more than the 45 minutes suggested (1hr 15min actual) on the product, but was otherwise not complicated nor did it have any surprises. Note that the hitch business bought both the Hitch and the wiring harness at the same time but didn’t do the wiring. Your hitch installer might do the wiring as well but either way, getting the wiring kit (see model below) through the hitch business is a nice efficient way and more reliable than EBay.
If your supplier does Curtis hitches instead, other folks have installed a Curtis 11529.
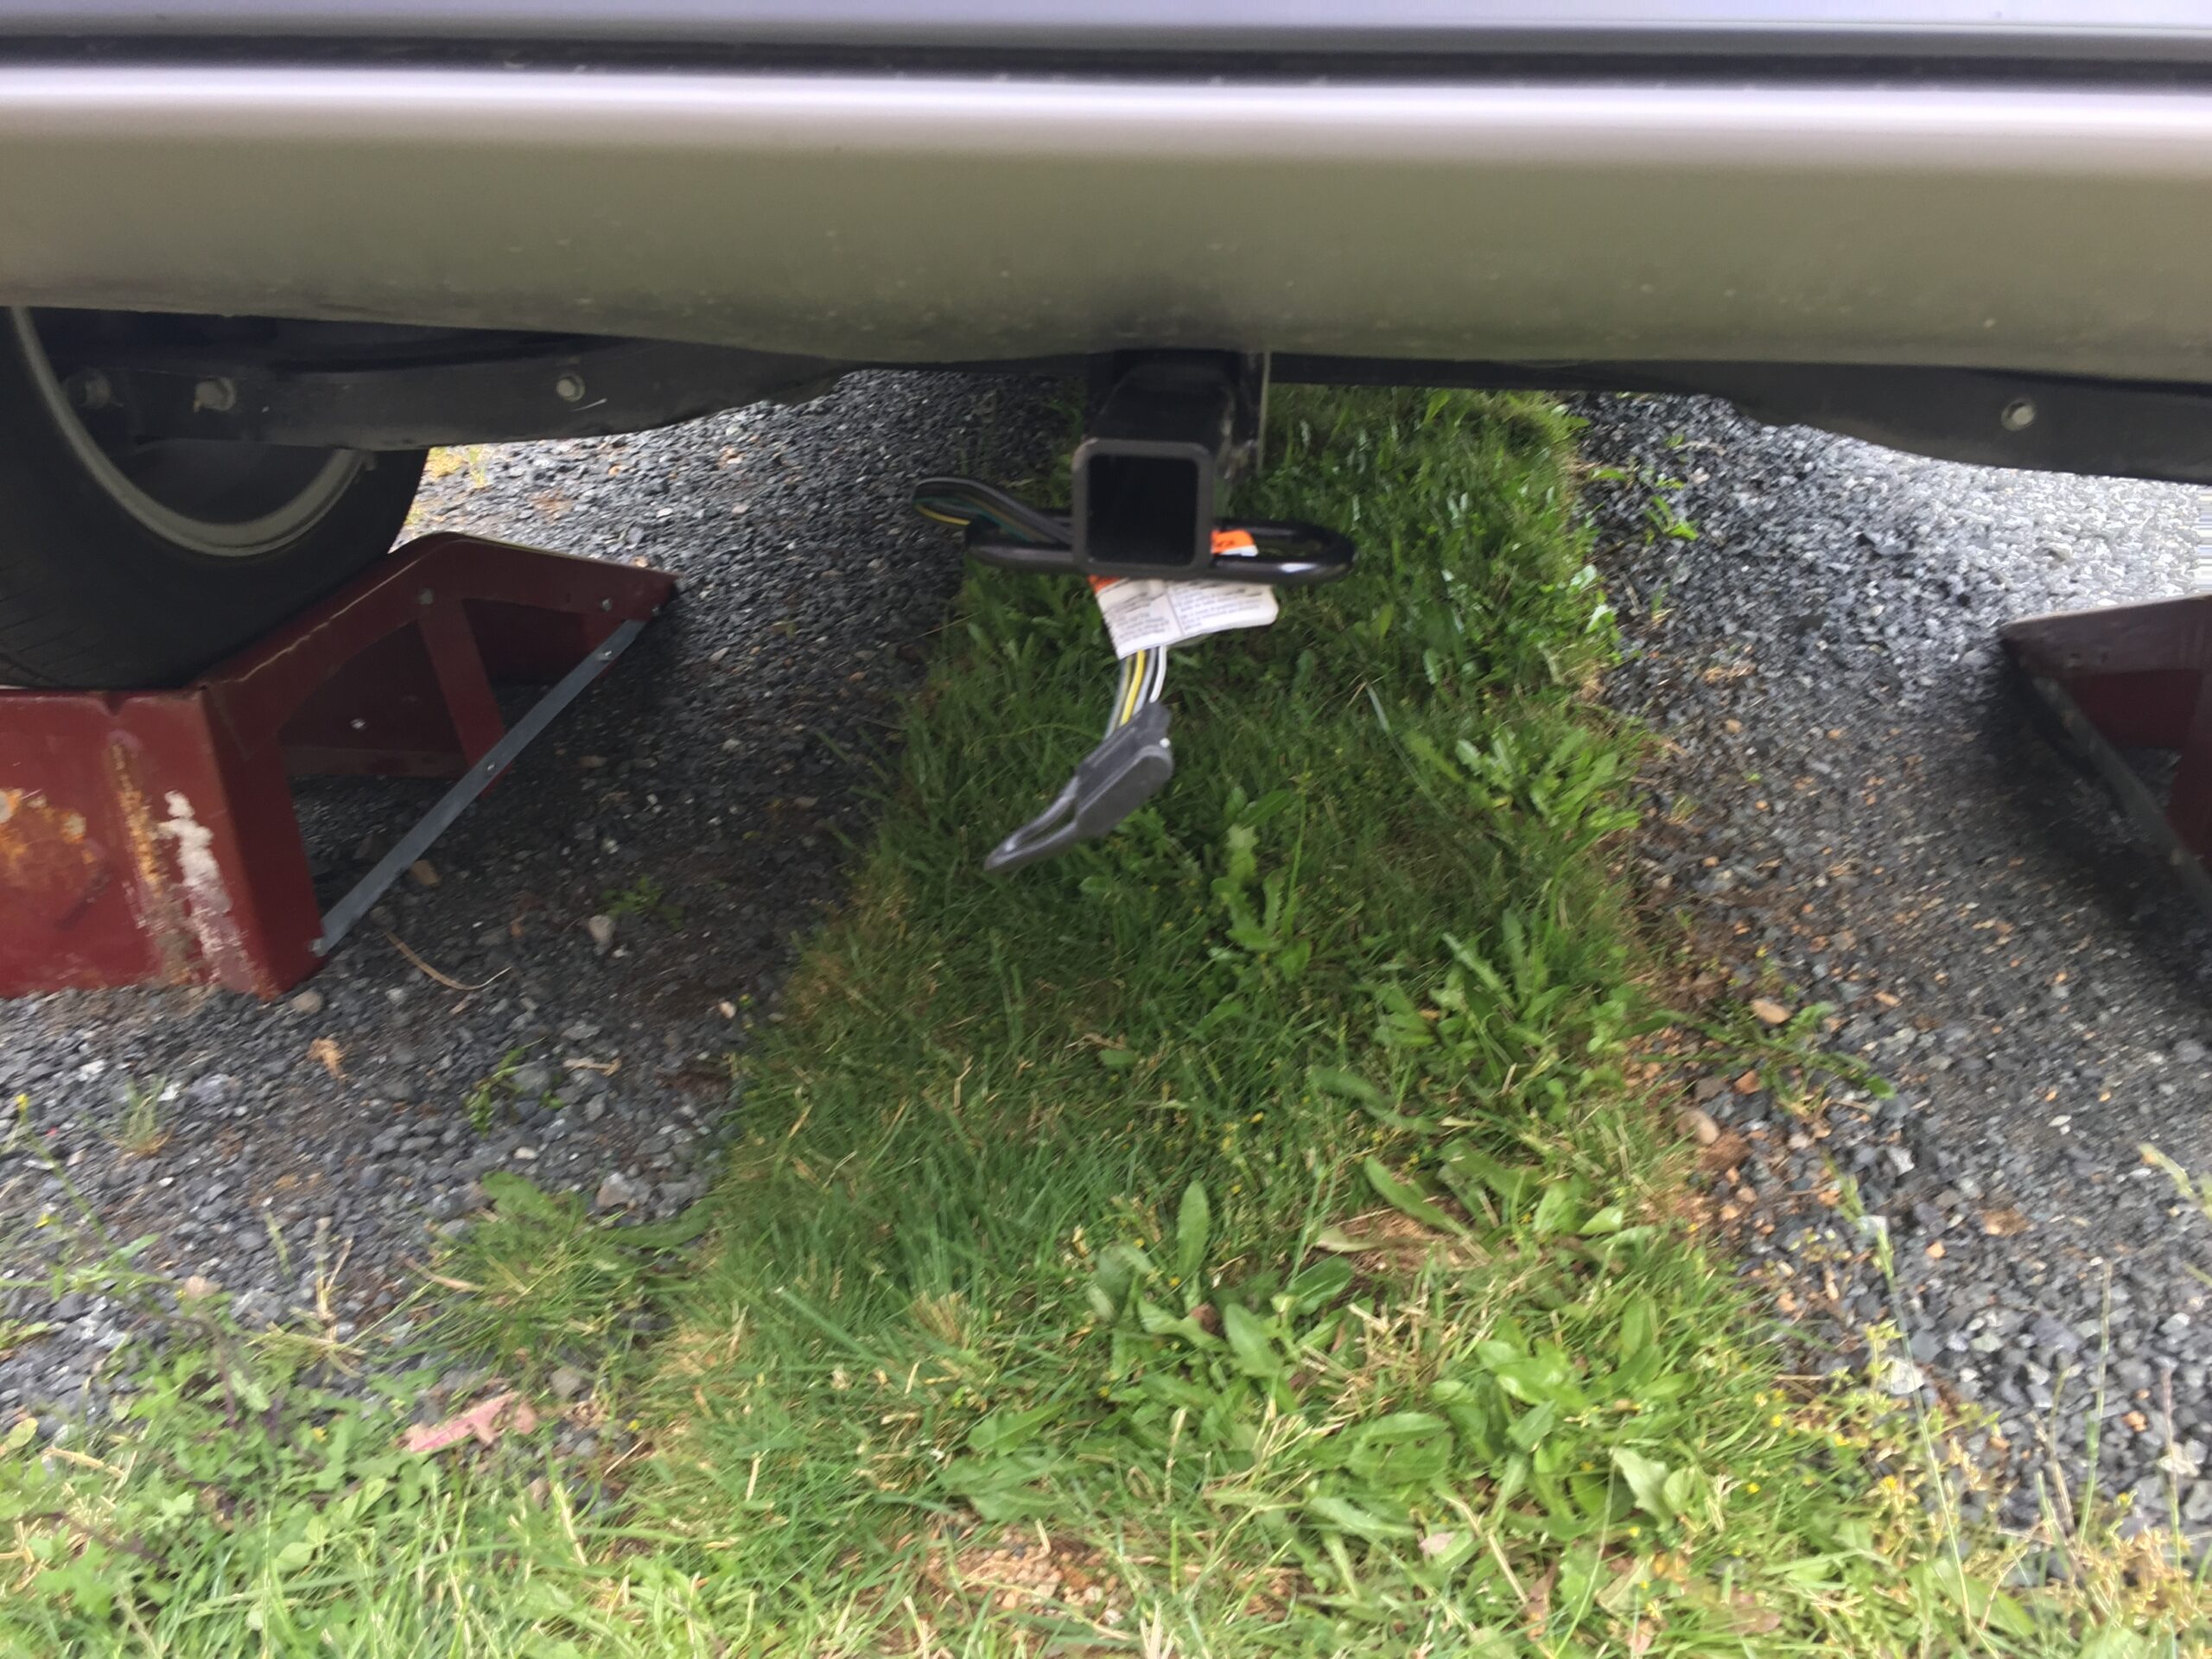
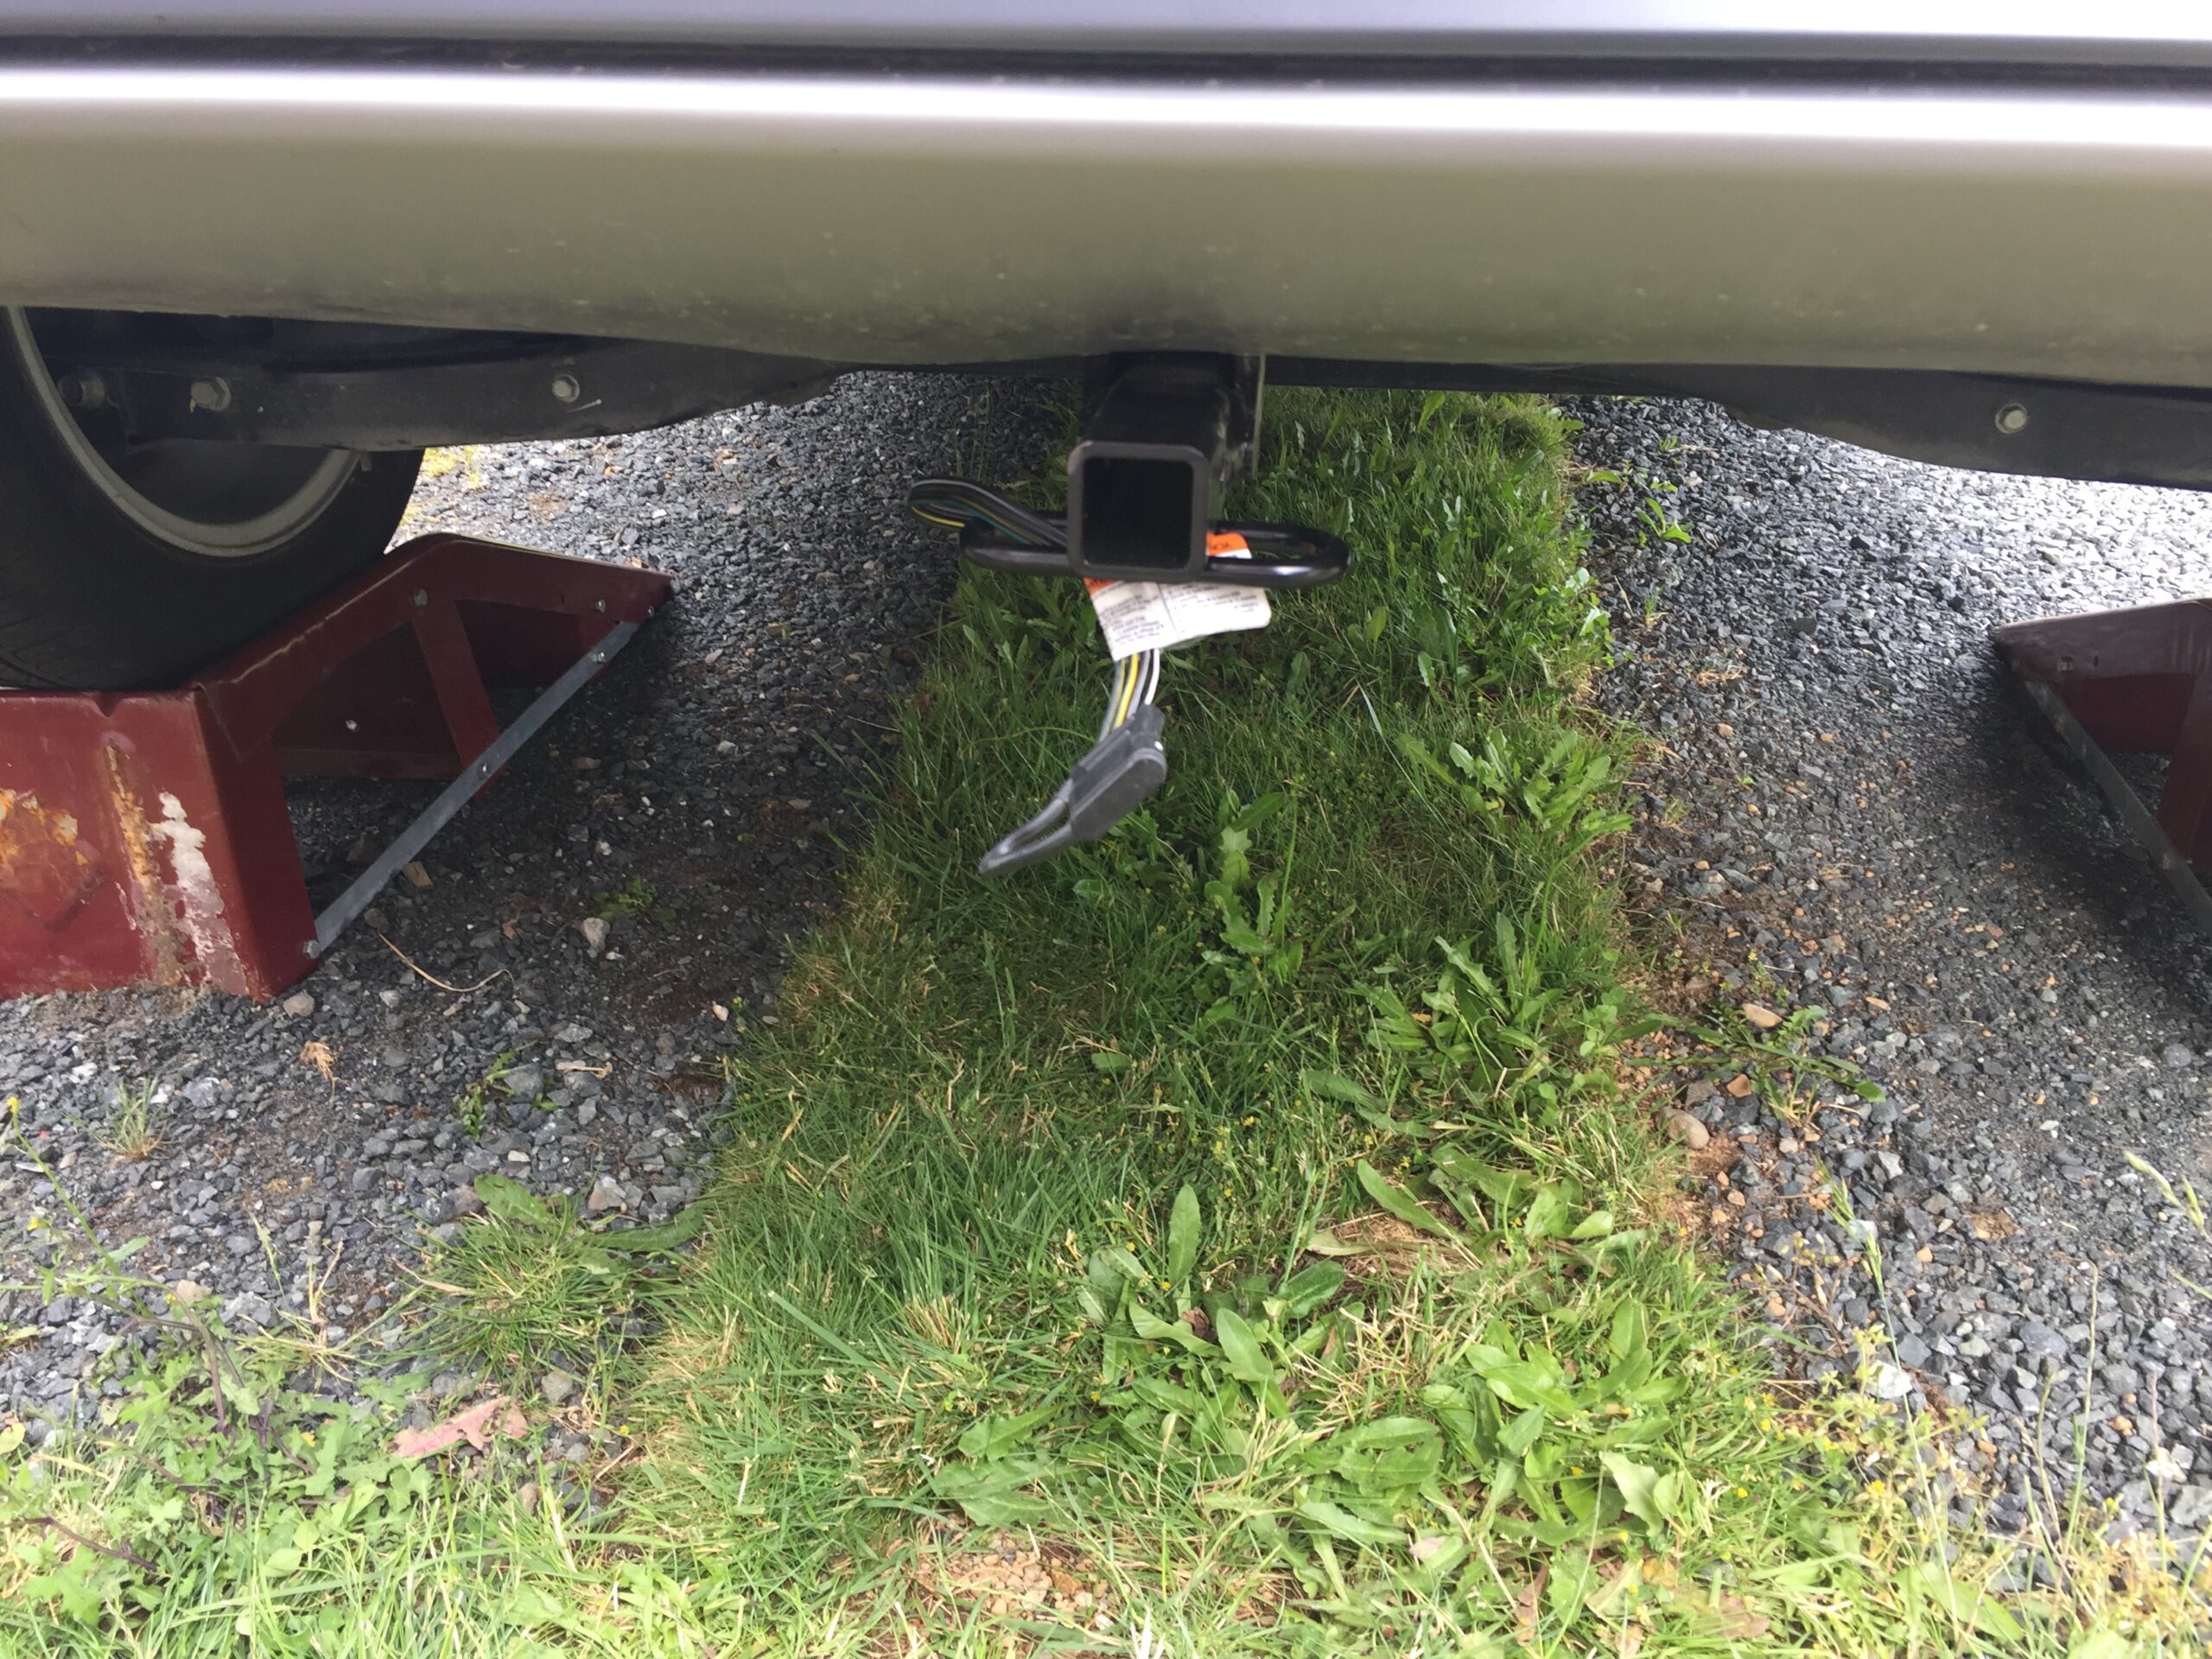
The only outside modification visible after installation is the cutout for the hitch in the plastic cover under the back bumper. No Big Deal!
The end height of the hitch from the ground is approximately 12 1/4 inches or 31.1cm.
The Wiring
After the hitch was installed, I turned to an electrician friend who’s done lots of car work too to do the wiring.
These two tools are essential:
A 12V Probe Circuit Tester for Cars
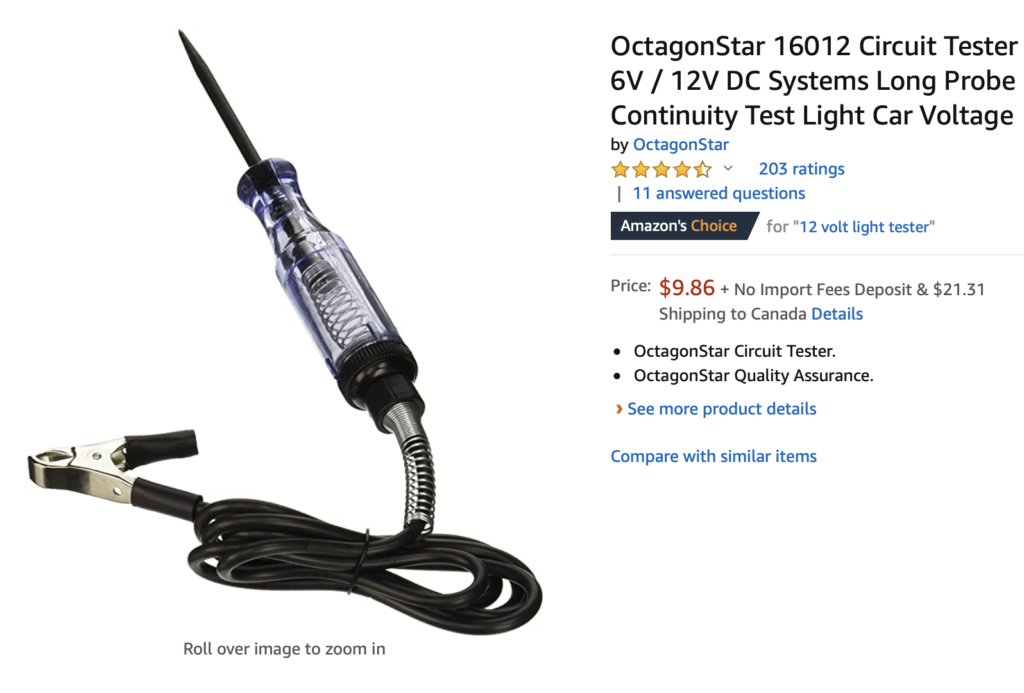
If the person doing the wiring doesn’t have one of these, even if you know the wire colours beforehand, you’ll need it.
Also, find some wheel ramps, if you don’t have access to a lift of course.

The Kona isn’t super low, but having it lifted up safely makes a big difference.
You need a good set of small and large pairs of pliers to squeeze with. A few spots are harder to get into and some of the KONA wires are tightly packed together. Wire cutters/strippers are needed too and I’d recommend shrink wrap or good electrical tape. The standard set of screwdrivers and socket set will be handy too.
Get some extra good quality zip ties too. You can never have too many.
The Wiring Kit
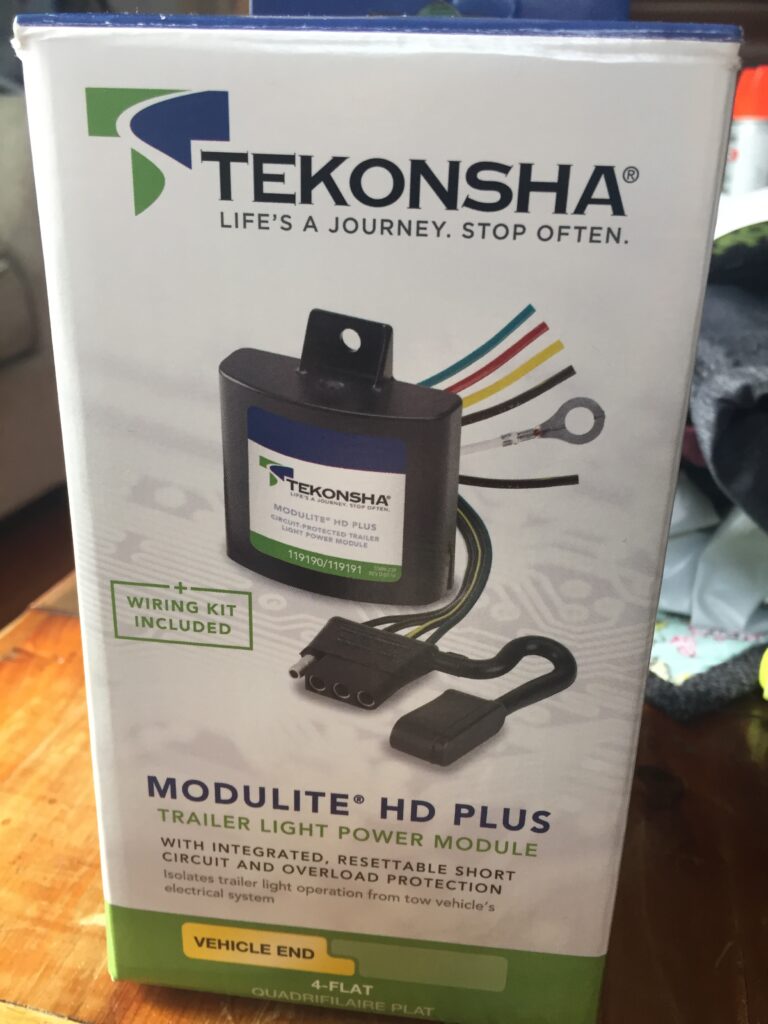
Draw-Tite recommends the Tekonsha Modulite HD Plus – Model number 119191.
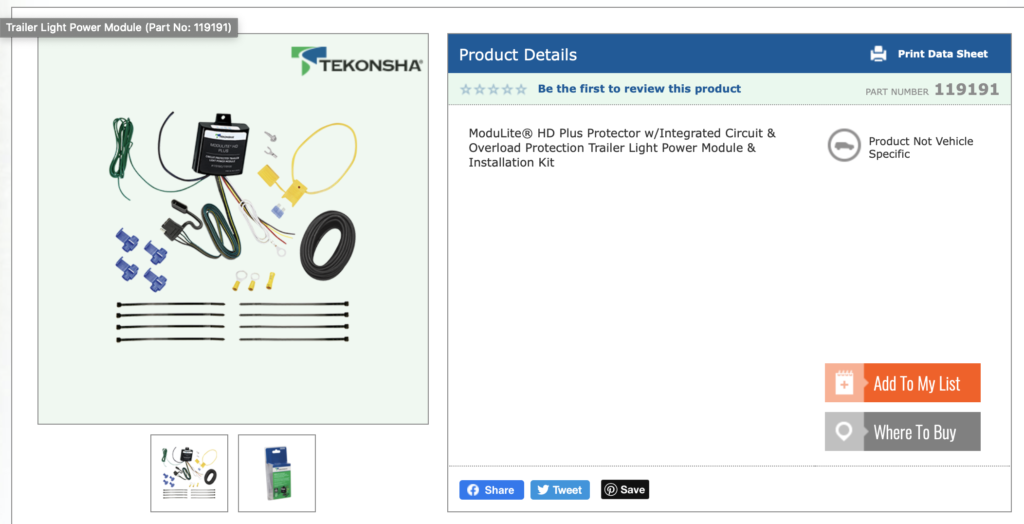
It comes with all of the wiring, zip ties and other bits you need in the box.
The kit has wires for the left turn (yellow), right turn (green), tail/running lights (brown), brake (red), ground (white) and battery power (red/black).
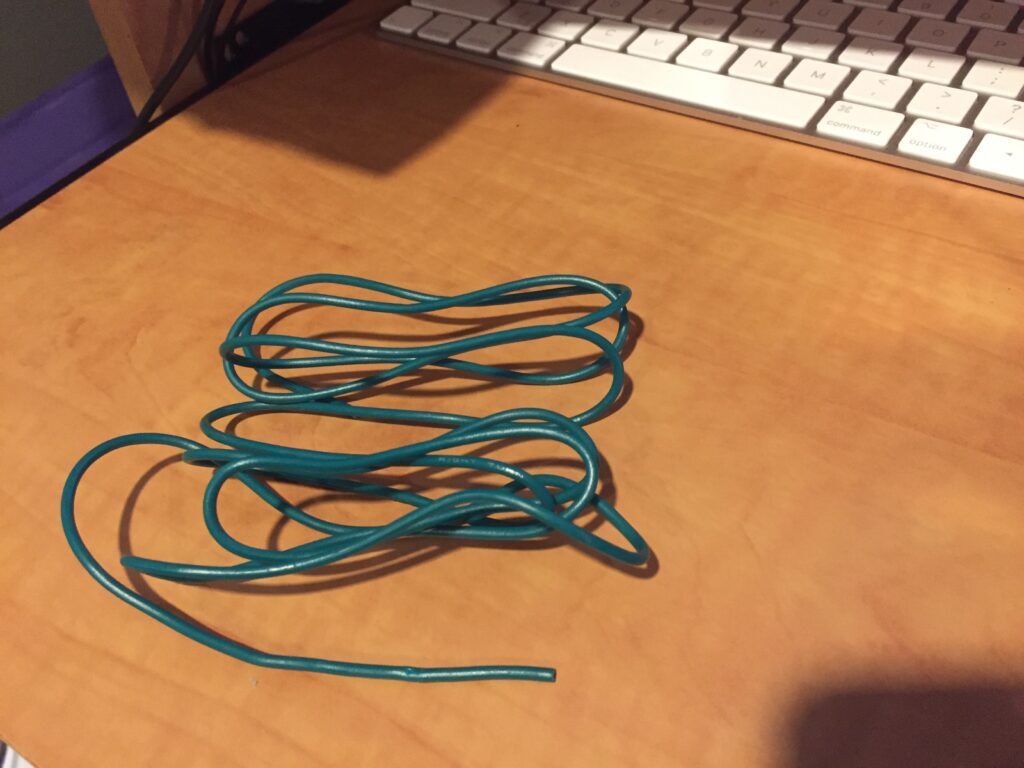
Because it is a Universal kit, you won’t need some things, don’t worry! For example, you will not need this bundle of green wire for the Hyundai Kona 2019.
Back end first.
This wiring kit must be connected to your tail lights as well as directly to your 12V battery. This is different from traditional kits so might throw folks for a loop, but it’s No Big Deal. You can start with the battery cable or with the tail lights. We actually did the battery first but after it was all done, I think it would have made a tiny bit more sense to do the back first. If only because that was the hard part and the battery wire was a breeze and would be a nice way to finish.
Where to find the wires.
Everything you need is in the space behind the plastic side panel of the trunk/hatch on the driver’s side. This is the only interior panel you need to remove, and you don’t have to completely remove it (we didn’t).
Disconnect the Trunk light.
You need to disconnect the trunk light on the driver’s side from its wiring. It just pops out and there is a simple white squeezable connector that will release the light so you can take the panel off more easily.
Loosen and access rear Driver Side Trunk panel.
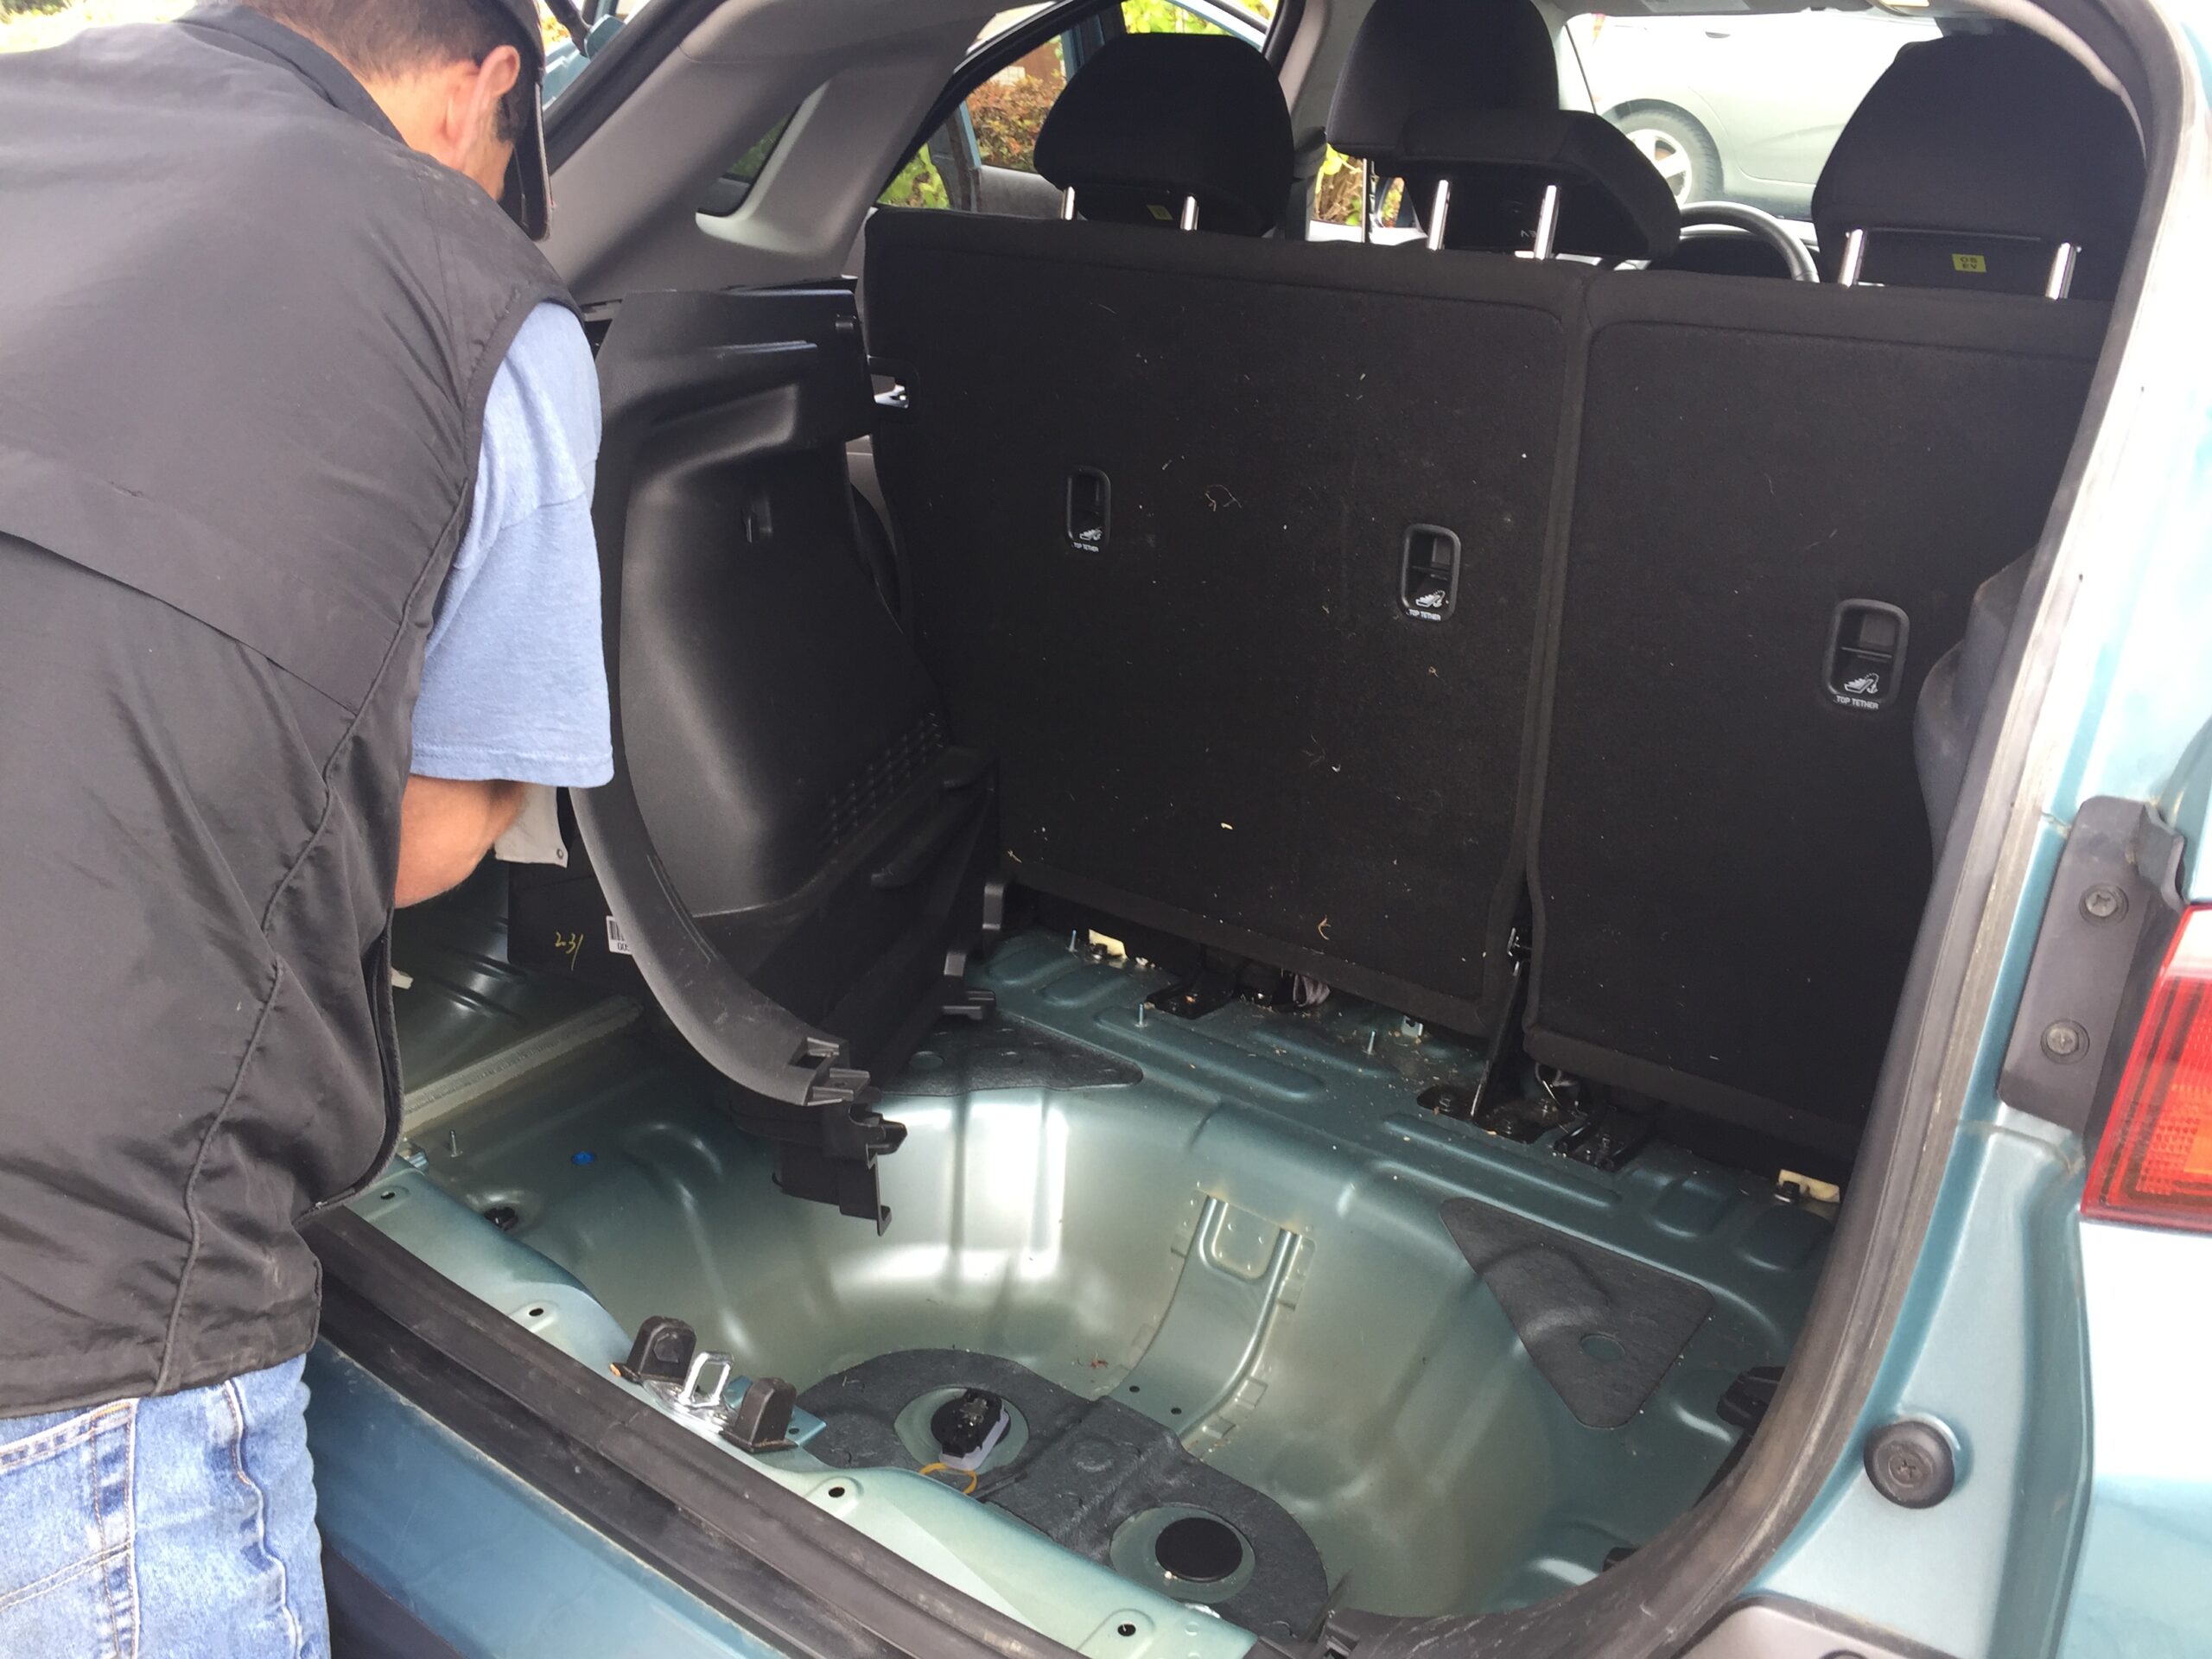
With all of the regular floor and styrofoam inserts removed from the back, first remove the middle plastic cover that goes around the trunk latch. It is held in place by two plastic plugs. They have a two step mechanism. Pop up the middle part with a small screwdriver then the rest of the plug will pull out of the hole easily.
Remove the three screws along the bottom of the drivers side rear panel and give the panel a good yank down and away while pressing on the top to release the latches.
It will come away from under the rubber seal of the trunk and away as far as the seatbelt holder.
Prop open the panel.
You can prop it open with a screwdriver or wrench by wedging it along the bottom.
Once that is open you’ll be presented with all of the wiring you need. You do *not* need to go to the passenger side of the vehicle for the other turn signal (Thus the unnecessary green bundle of wire before). Yay!
Open up the underside
You’ll need to get under the vehicle to see where things are coming and going.
Remove the plastic buttons (pop the middle section up first, then pull) that hold the bottom plastic cover under the car. (The same cover that the hitch sticks out of). Again, you only really need to remove the driver’s side portion so it hangs down enough to get at. No need to take the whole thing off.
Watch out. The little black buttons like to pop out and fly away!
Remove and Disconnect Top Drivers Side Tail/Brake light.
In order to get at everything more easily, we found it best to remove the top tail light on the driver’s side. Apologies I don’t have a picture of that side (You can see the passenger side tail light assembly in the previous picture) but it is very easy.
With the hatch open, remove the two screws holding the top drivers side tail light, put both hands on the light and gently pull the whole light assembly straight out toward the rear. It should pop out easily. (Note: When you re-install it, be sure the little white plastic plug on the assembly is properly aligned with its hole. Mine seemed a little loose so didn’t always stay in the right orientation to fit back in and it prevented the light from going back in nicely.)
You will want to disconnect the top driver’s side tail light assembly completely from the car. With your fingers, remove the rubber grommet where the wires go into the vehicle and gently pull the wire out until you come to the white connector. You can unplug the assembly from the white connector and put it aside.
Feed the disconnected wiring back inside the car and out to the trunk area so you can see it and work with it.
Mount the Power Converter
Next we mounted the Power Converter. There should be a self tapping screw and double sided tape in the kit. You can also use this screw for the ground and use the two-sided tape to apply and secure the module or use the screw for both.
Update: Note, I changed the location of the ground and separated it from the controller afterward. You can see that in the update to this post at the very bottom.
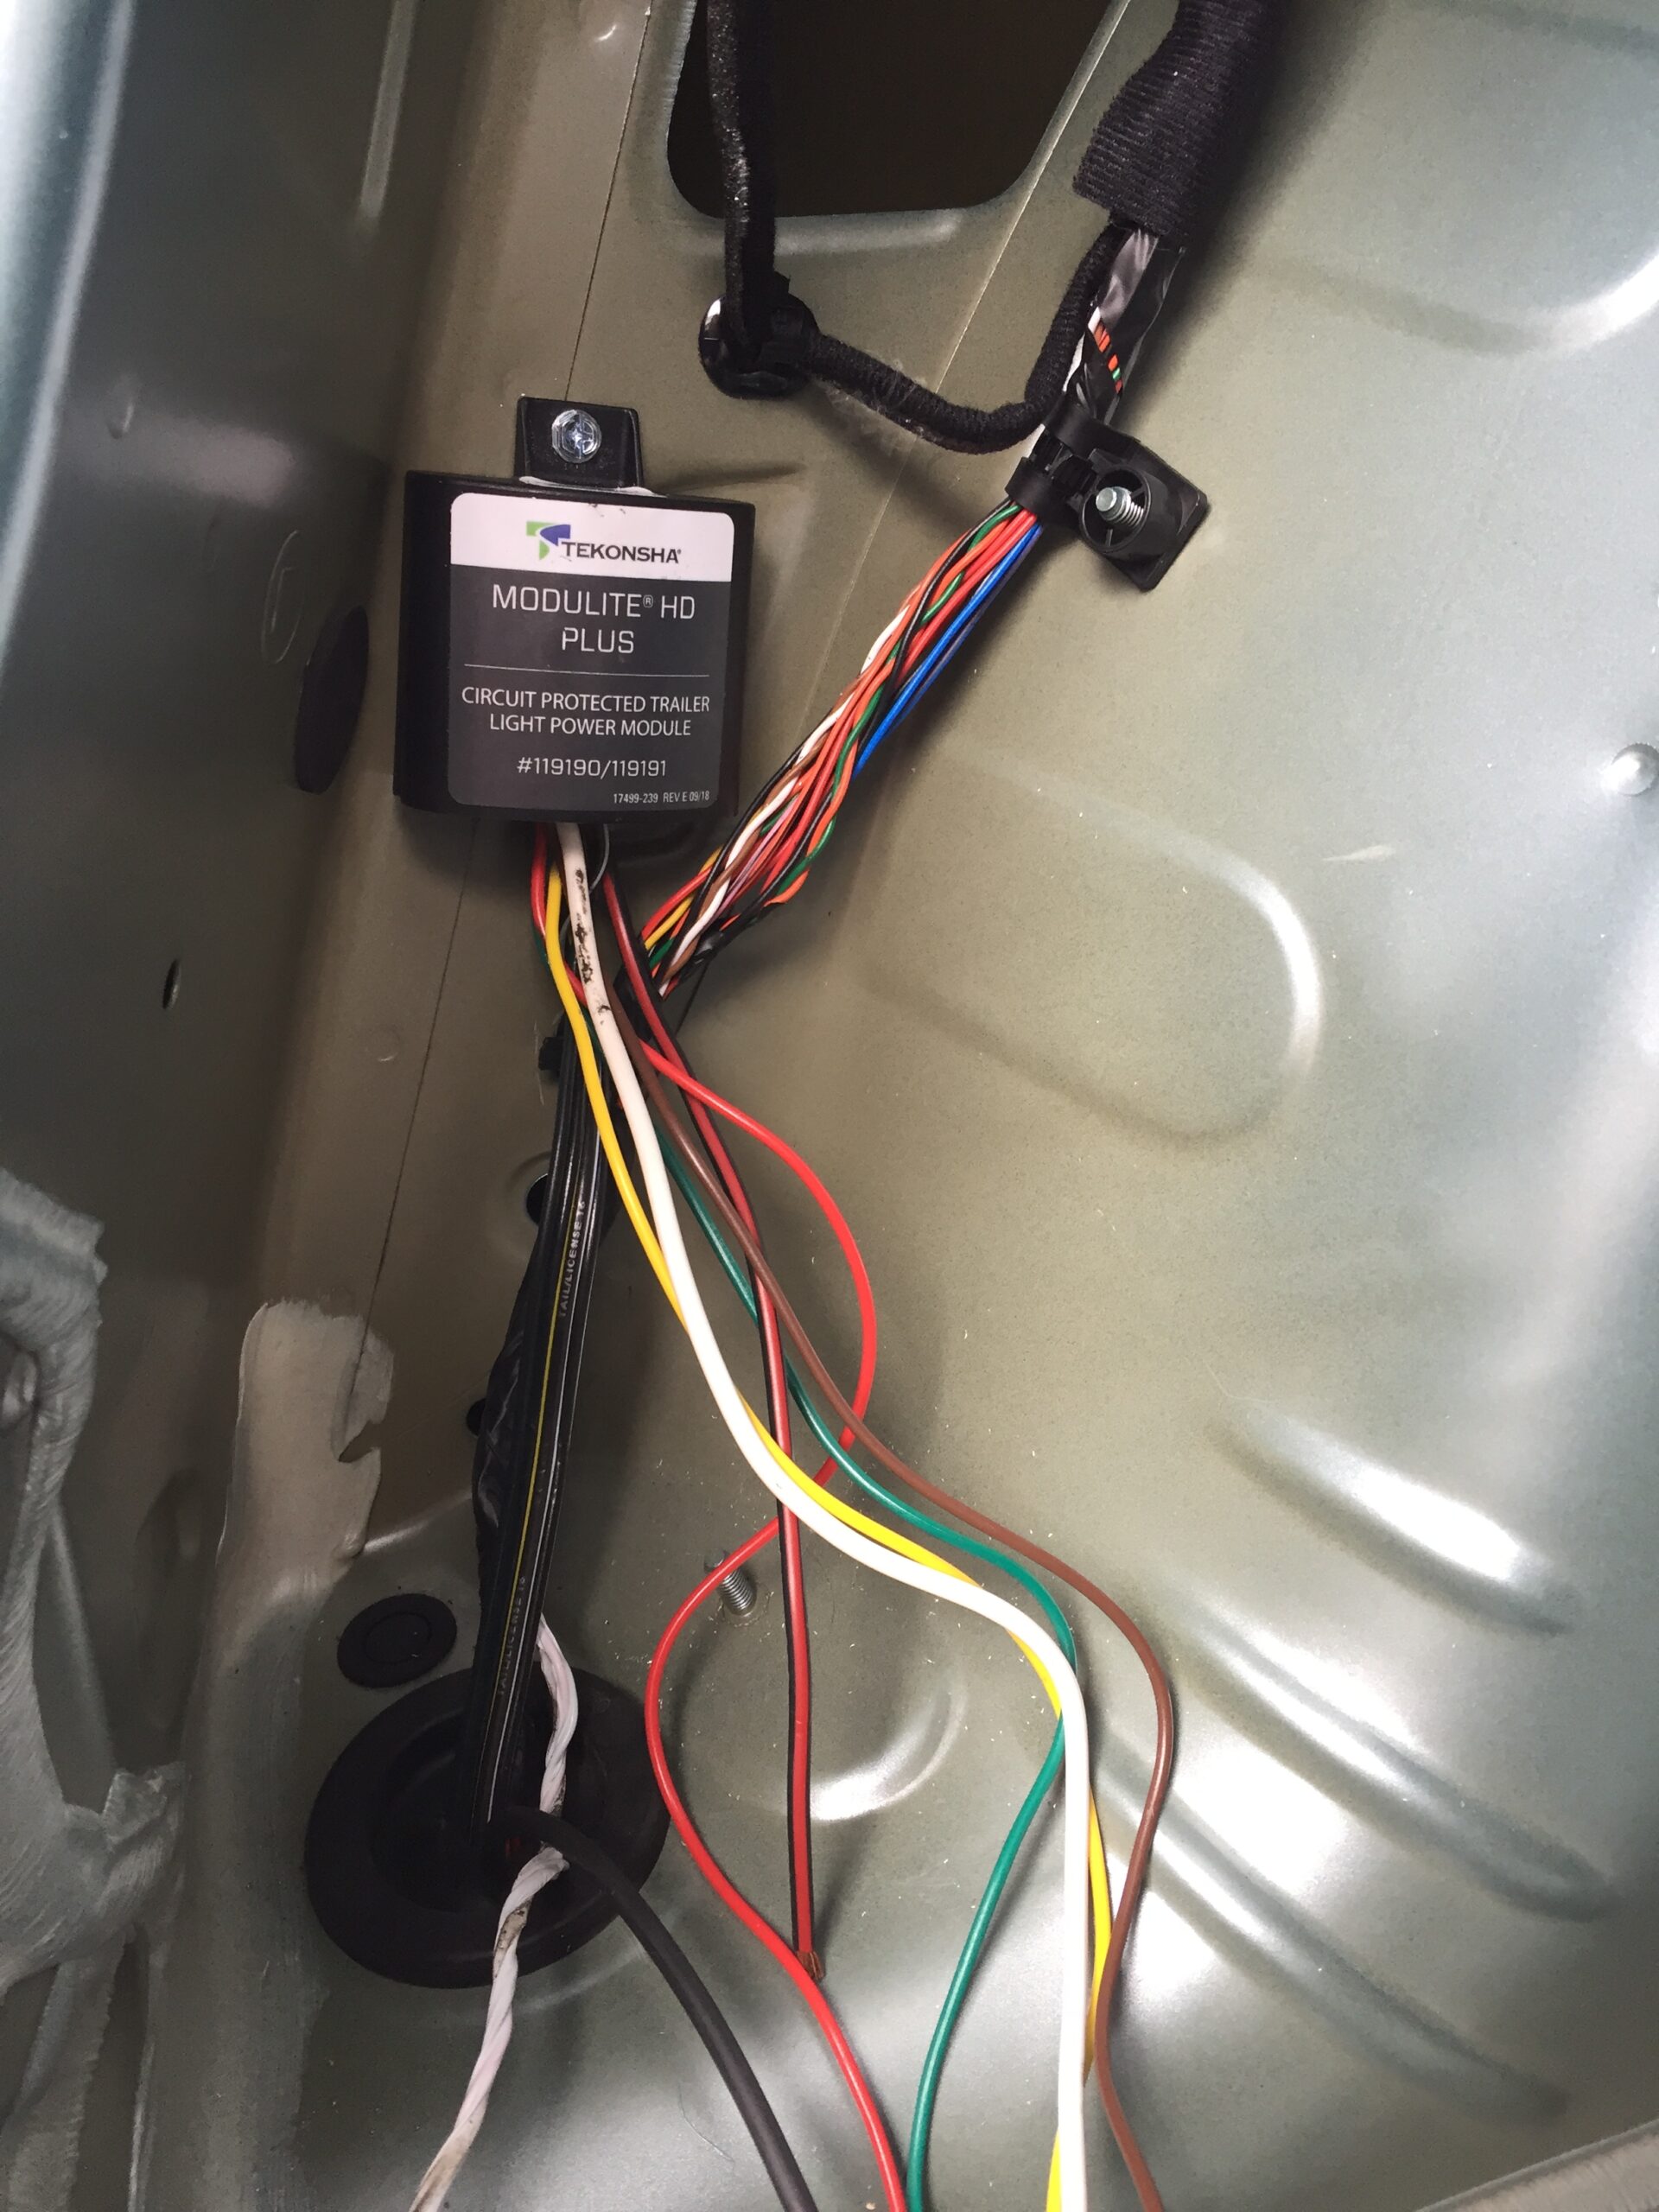
You can see here the unmodified KONA wiring harnesses with wires exposed along with the HITCH power converter with its wires.
Pass through the 4pin plug and battery wire – slice the grommet.
There is a rubber grommet where the wiring passes to the underside of the car. This is the only major modification you will need to do to non-wiring things on the vehicle. You’ll want to carefully slice the rubber so that the 4pin trailer harness can pass through it and down to the underside of the car. It’s a tight squeeze.
Make sure you slice it carefully and don’t disturb any of the existing wires. We made two slices and it was enough to force the hitch harness through and the rubber still be tight once through.
You need to pass the long brown battery wire as well, leaving yourself enough to make the connection with the power converter.
I’d recommend some silicone to heal the wounds in the rubber once you’re done.
Make the Connections – Wire Testing and Matching!
Now comes the hardest part of the entire install, finding the right wires and splicing them in. You will use the blue connectors in the kit.
TEST TEST TEST
NO MATTER WHAT COLOUR I SAY BELOW, TEST WITH THE PROBE TESTER BEFORE YOU CONNECT.
Some of the wires are easy to differentiate. Some are NOT. Test them all before you connect the power converter wires! Have a pair of pliers handy and maybe an extra hand to hold the wire in the connector while you squeeze it. Make sure the wires are tightly set.
Tail Running Lights and Brakes

Find the wires you disconnected from the top tail lights. Peel the covering away from the wires just to the rear from the connector. It’s sticky.
BRAKE WIRE : KONA White/Orange to HITCH Red
TAIL/RUNNING WIRE : KONA Green/Black to HITCH Brown
Right/Left Turn Signals and Ground

The wires are all exposed, but there are a lot of them!
LEFT TURN WIRE : KONA Blue/Pink to HITCH Yellow
RIGHT TURN WIRE : KONA Red/Pink to HITCH Green
GROUND : Attach a ring terminal to the HITCH white wire and secure it to the self tapping screw in the chassis.
Battery Wire
Only one wire left!

Use a yellow butt connector to attach the HITCH Red/Black wire to the long heavy grey wire included in the kit. Make sure it’s a good connection and secure it with shrink-wrap and/or electrical tape.
Zip Tie and Take up Slack.
You should be mostly done in the back (but don’t button everything up yet, still need to test!). You can do some zip-tie’ing to take up some slack but maybe wait until you’re all done for sure.
Feed the Wiring Harness to the trailer hitch.
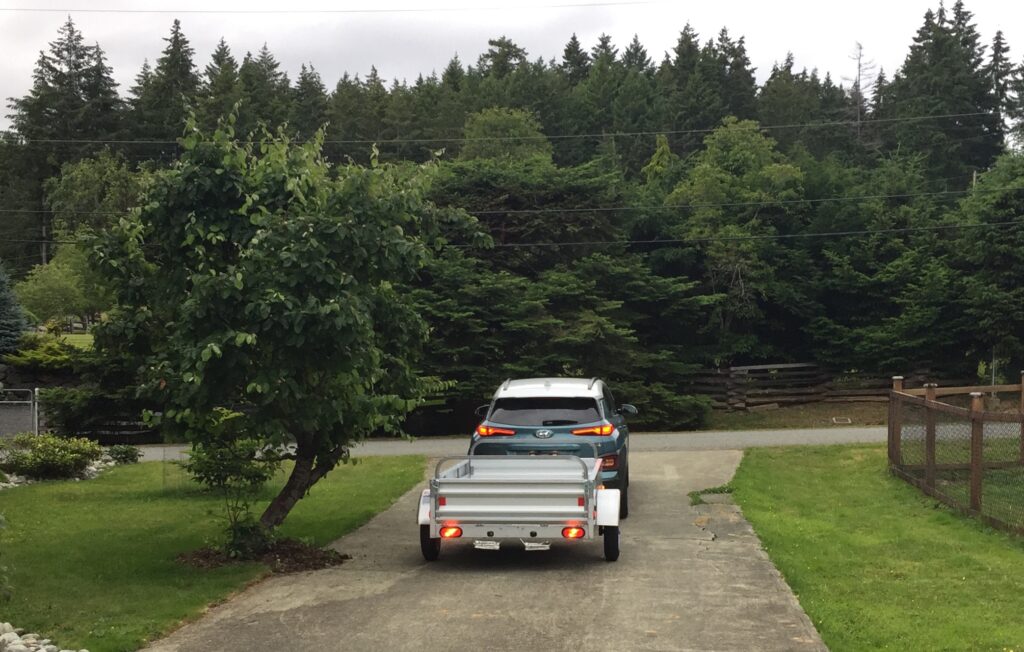
Now that the wires are coming out the bottom of the car you should be able to feed the 4pin wiring harness inside the plastic cover, securing with zips as needed, and all the way to the hitch so that it hangs out, waiting for your trailer, like this:
But we’re not quite done yet.
Feed the Battery Wire to the Engine Compartment.
The Power Converter requires a direct connection to the battery positive terminal with a fuse in between. The long grey wire and yellow fuse holder are included in the kit.
Thankfully, feeding the wire is not too bad at all. There are good spots to hide and protect the wire and attach it to other bundles along the way.
Starting from the back, we passed the wire down from the grommet to the underside of the car and found our way to a spot in front of the rear tire.
You’ll need to be under the car to feed the wire from the back to the tire area. You can see the grey wire sneaking along the existing line just in front of the tire (red arrow). It then goes down toward the driver’s side and bottom of the car and into a hollow rail.

You can feed it through the rail along the drivers side edge of the bottom using the holes that go along the bottom as places to take the wire out, feed it through, and continue on. Make sure the wire doesn’t get kinked.
This will take you all the way to the front wheel.
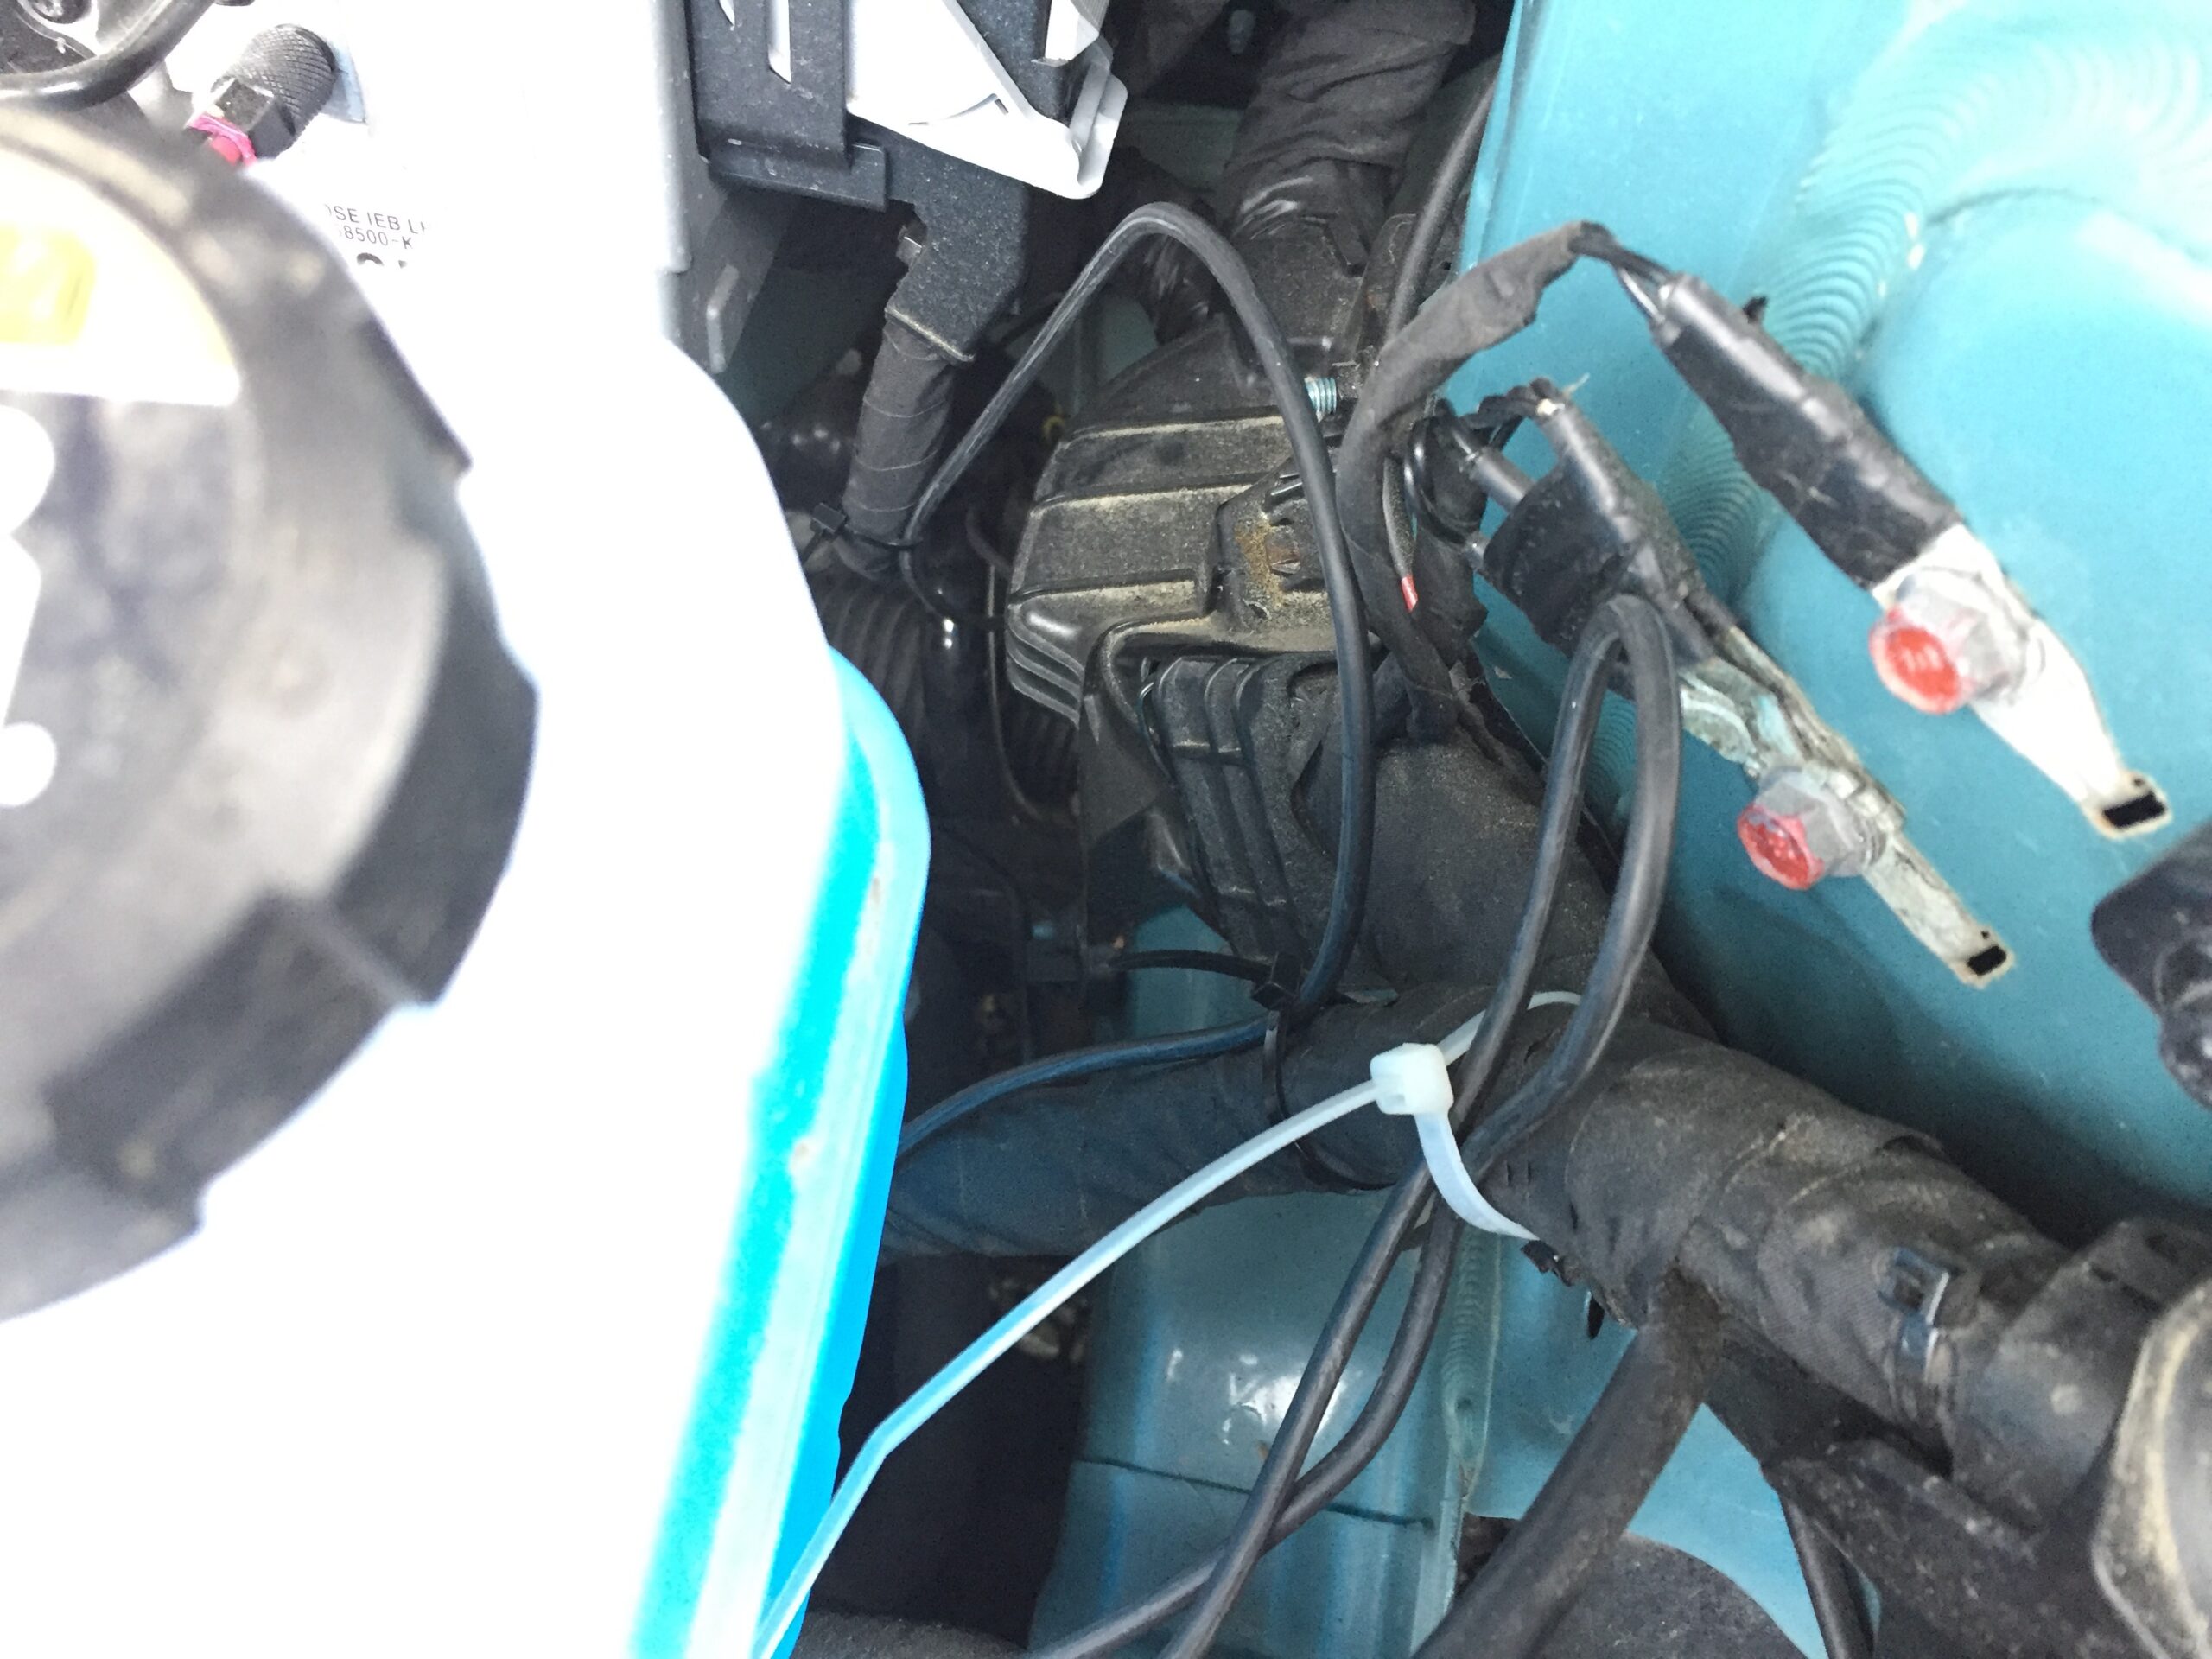
Feed it up into the engine compartment on the driver’s side. You can follow the other wiring harnesses that go to the large fuse box on the driver’s side. Make sure you zip tie it securely so it’s not flopping around.
(Note, we had a lot of slack so twirled it up temporarily)
MAKE SURE THE CAR IS OFF.
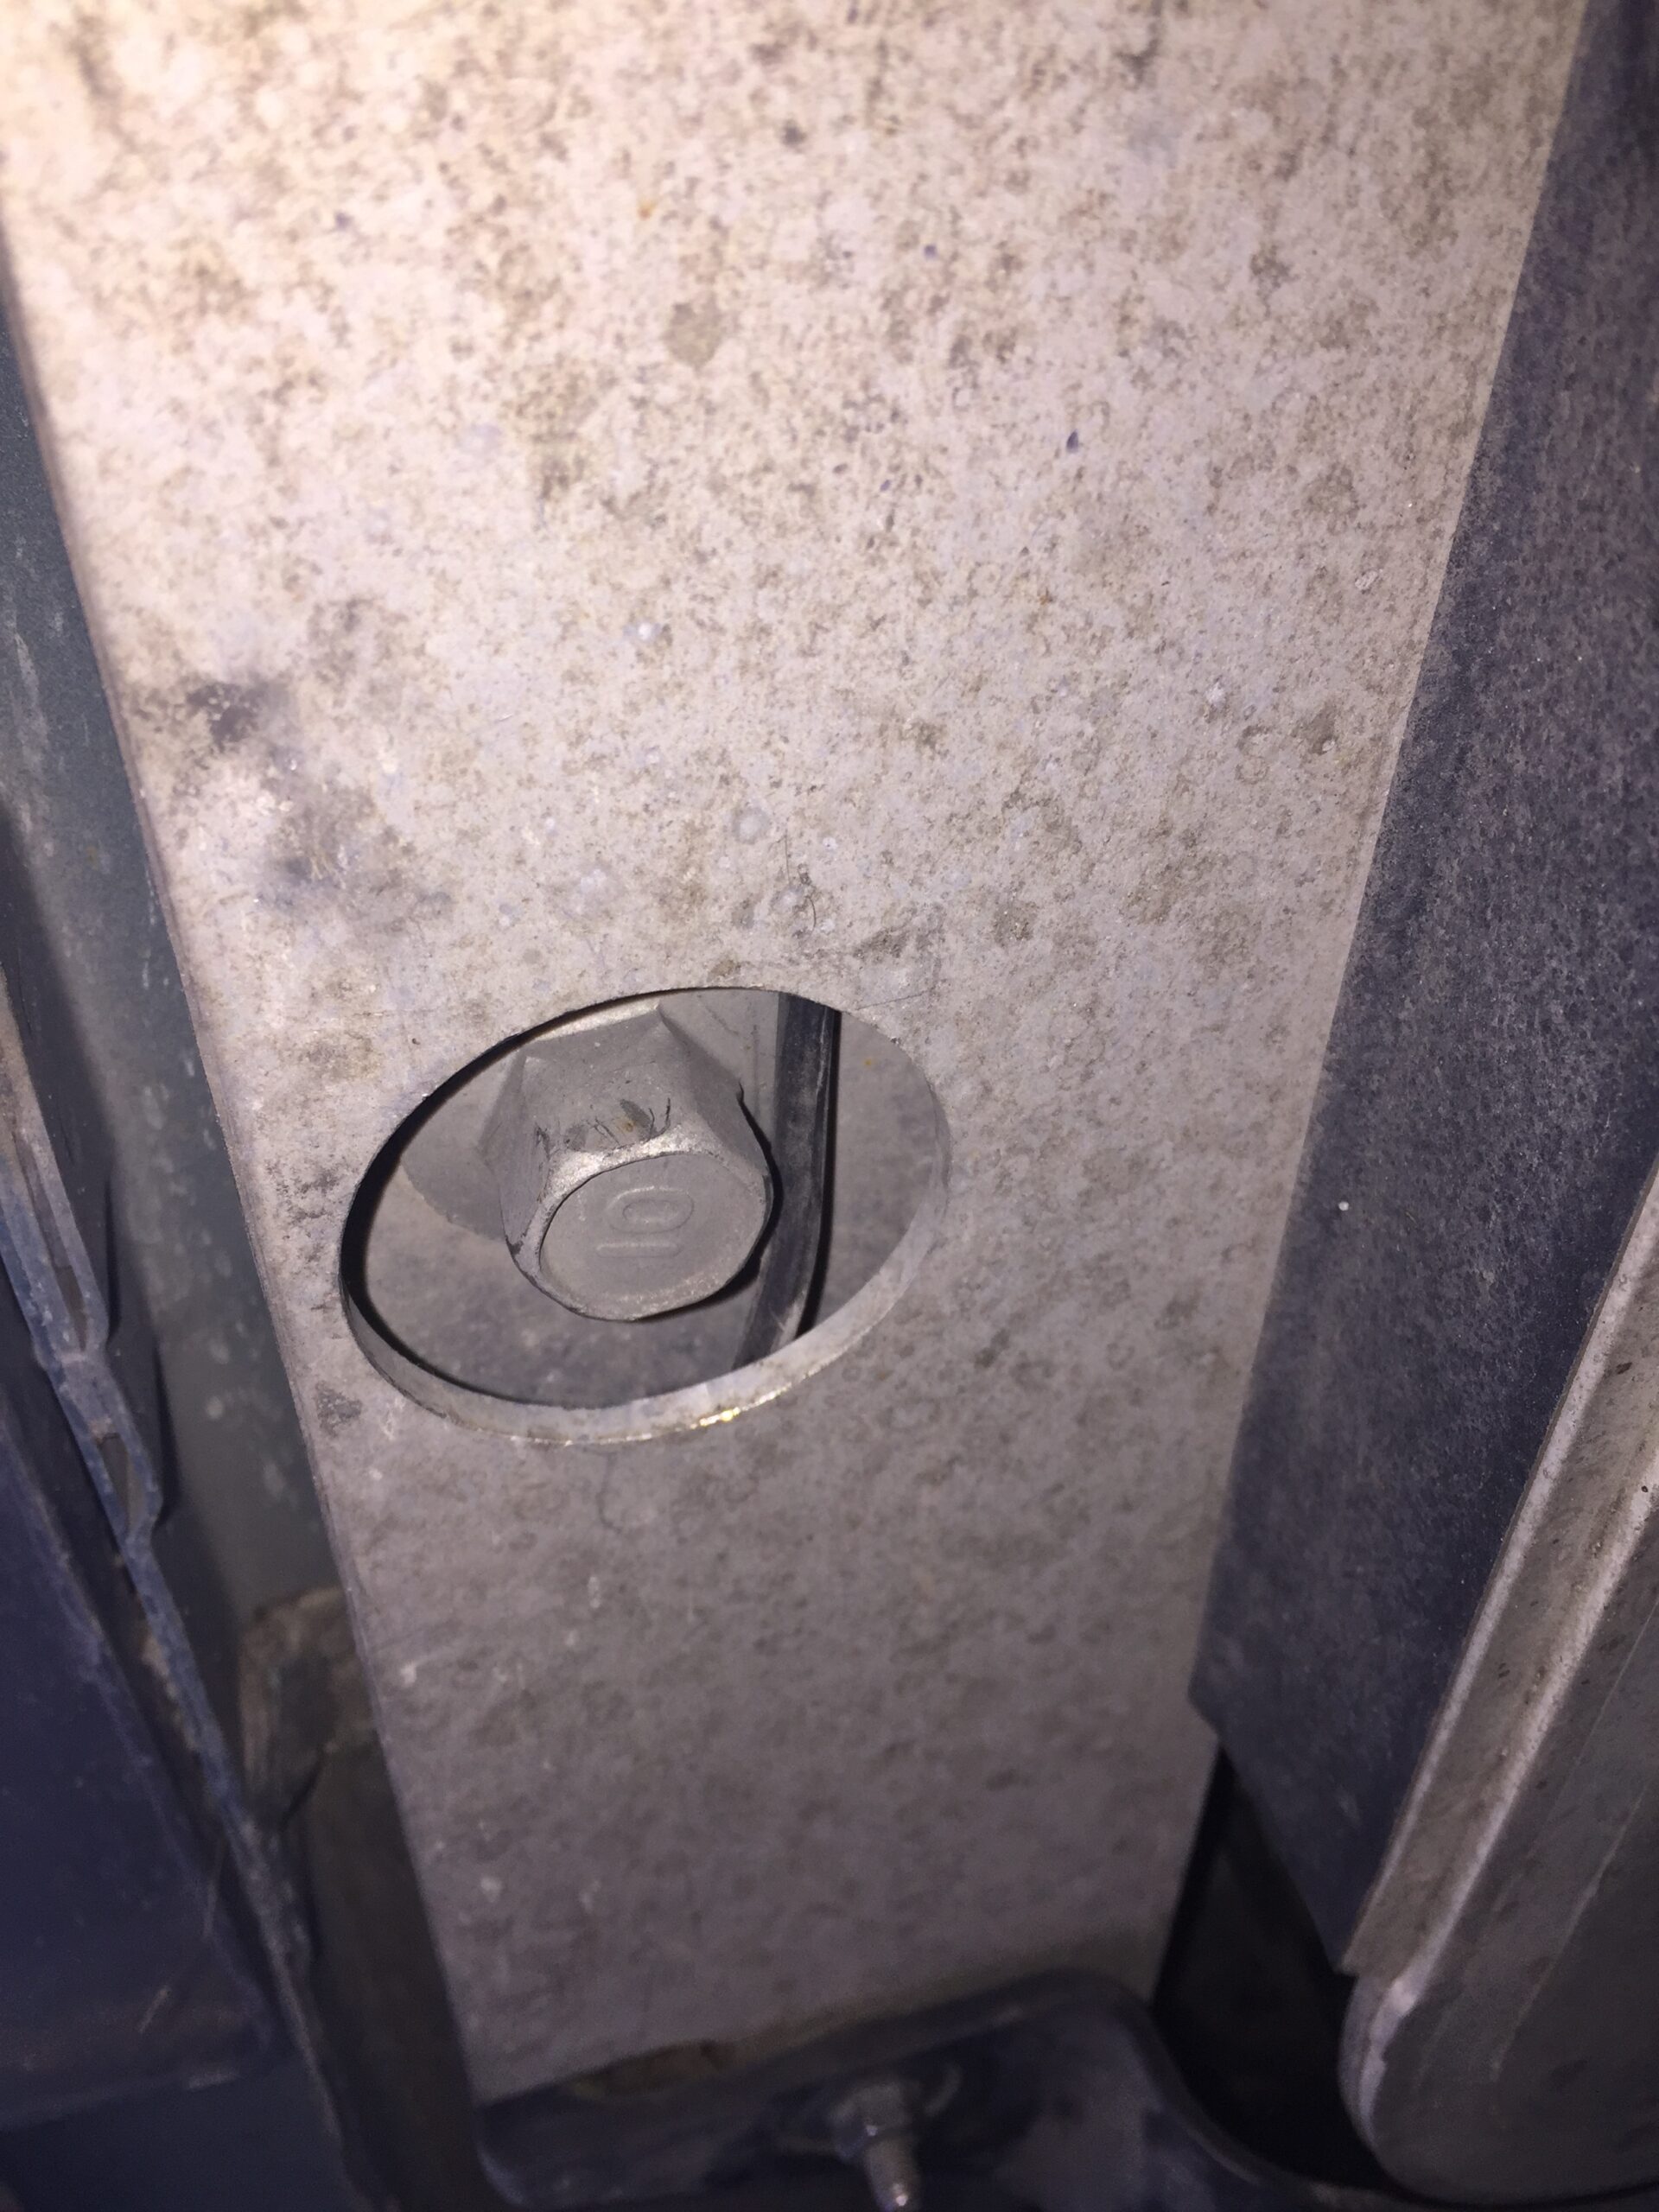
You can pass the wire right up into the positive terminal from underneath! Very handy. No cutting notches required! Note, you can also wait and pass the yellow fuse wire up here instead, leaving the battery cable completely on the outside of the battery. It is up to you.
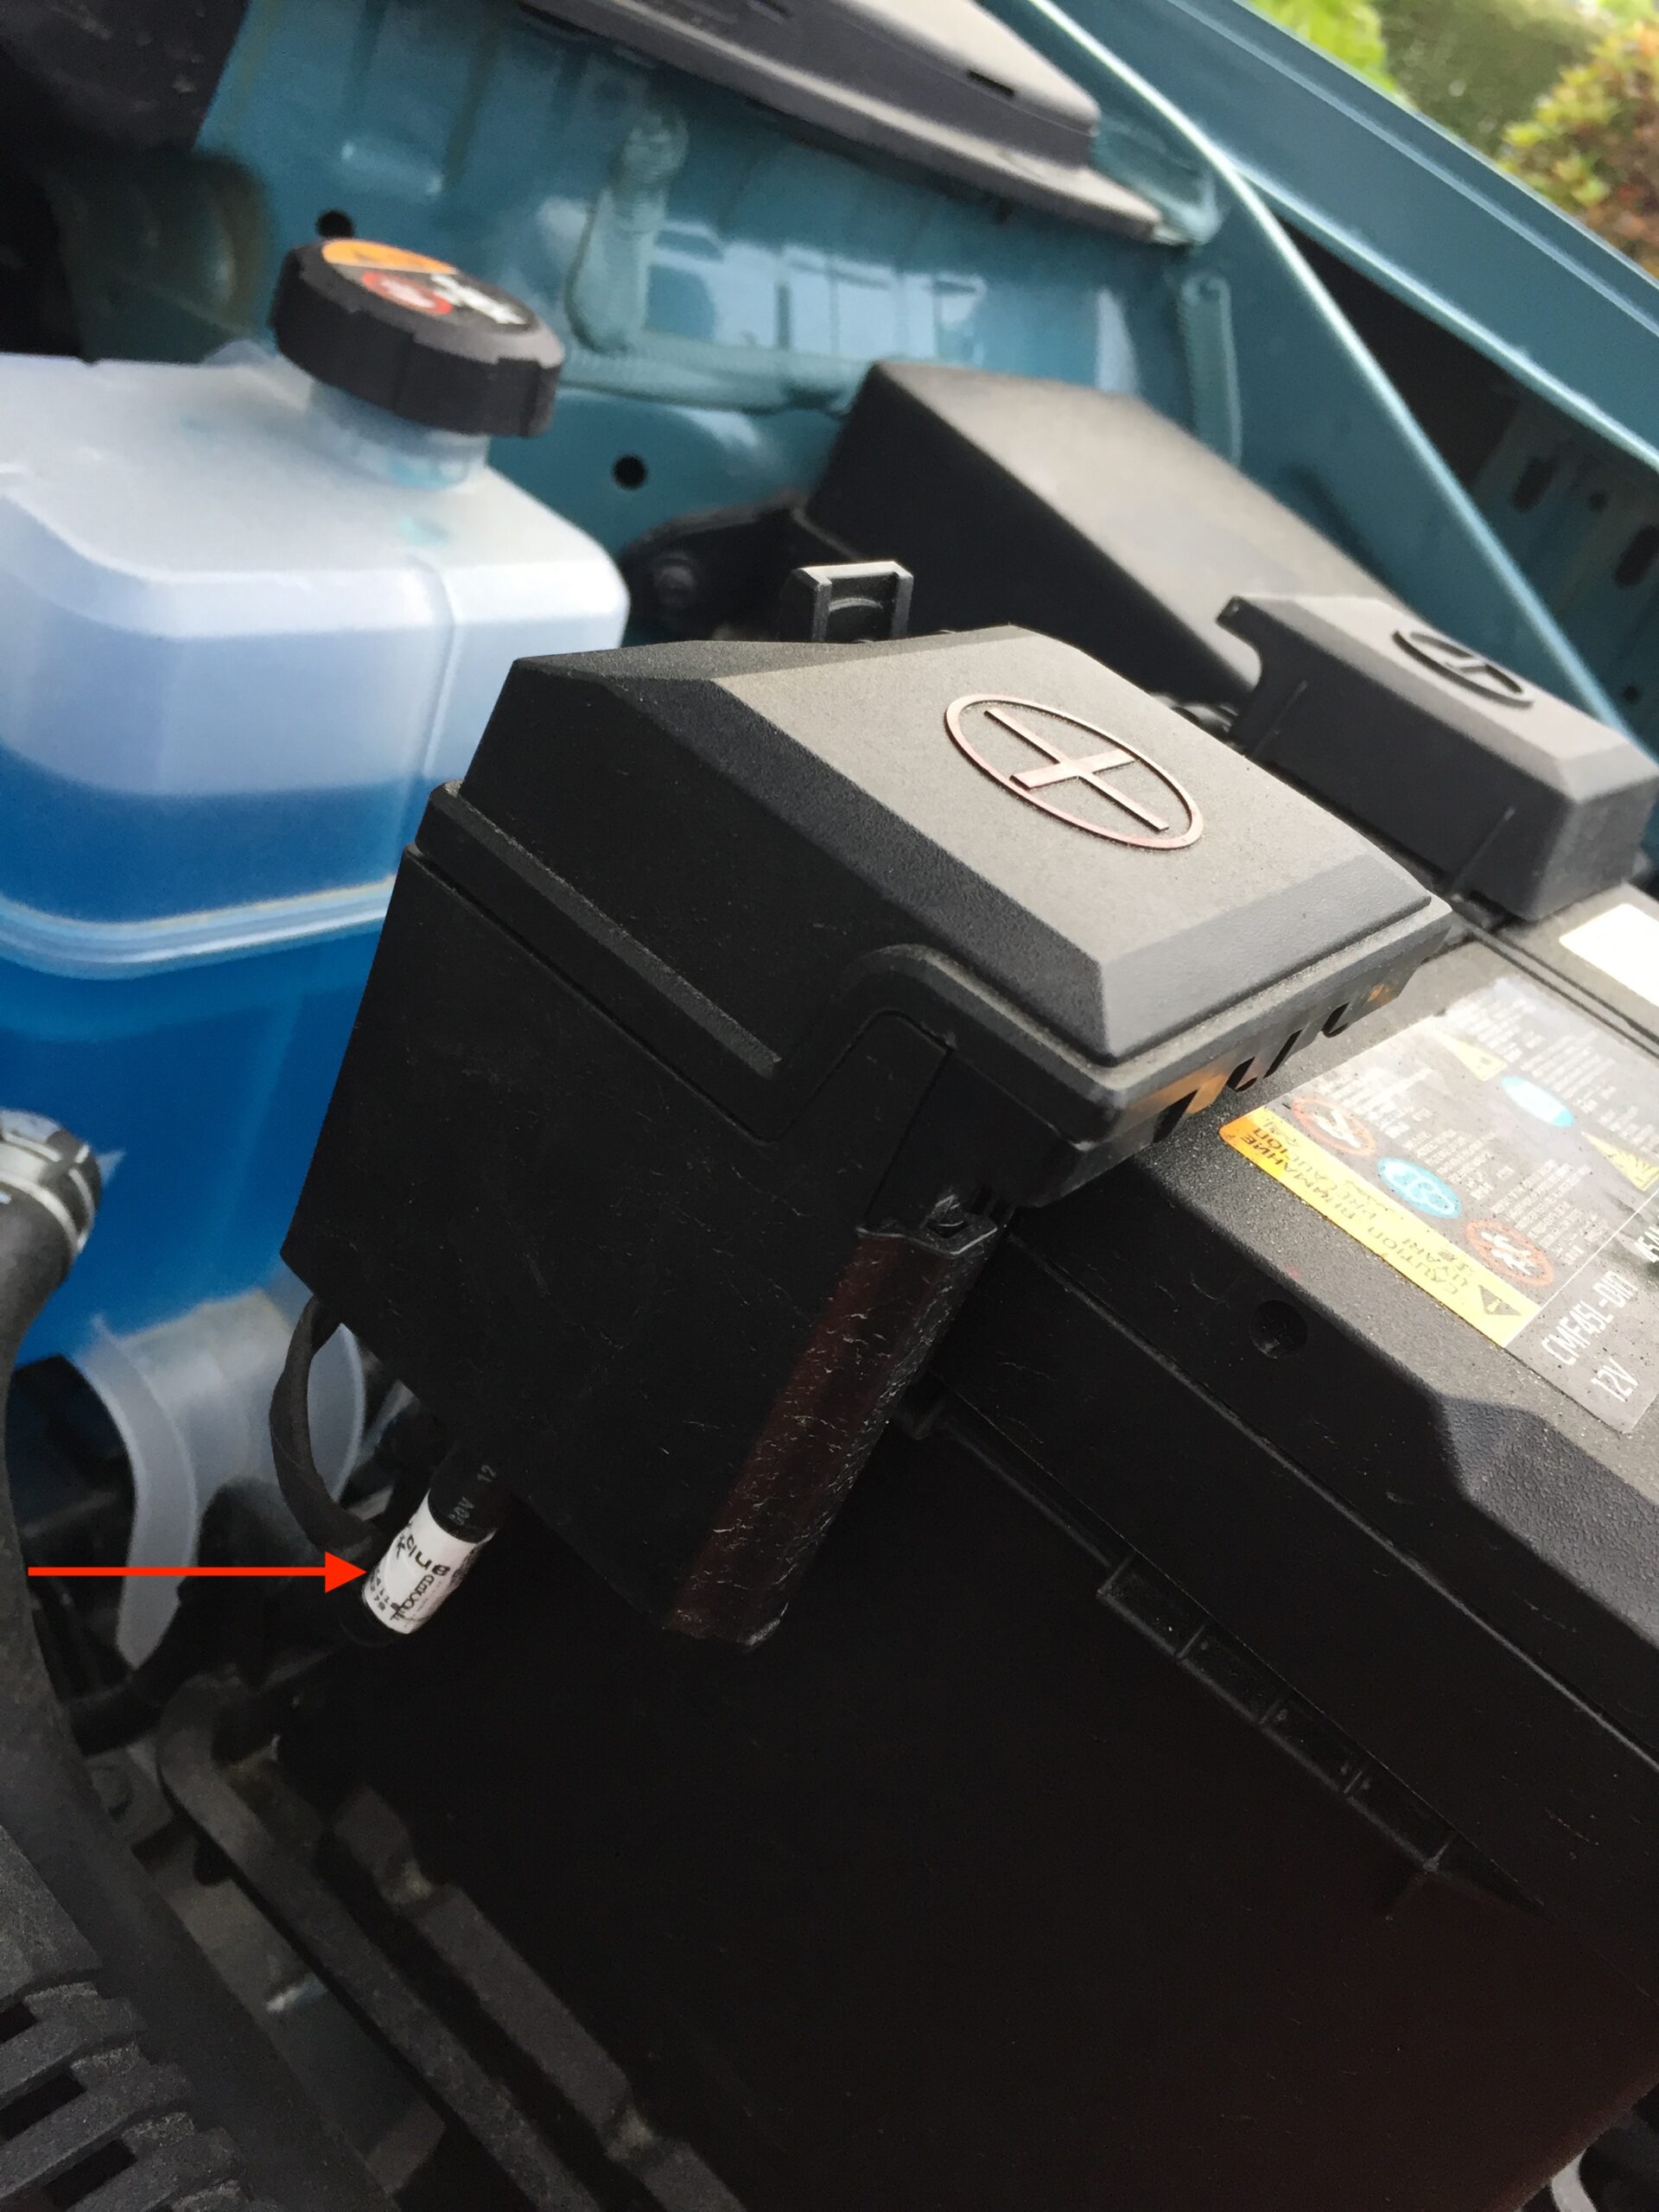
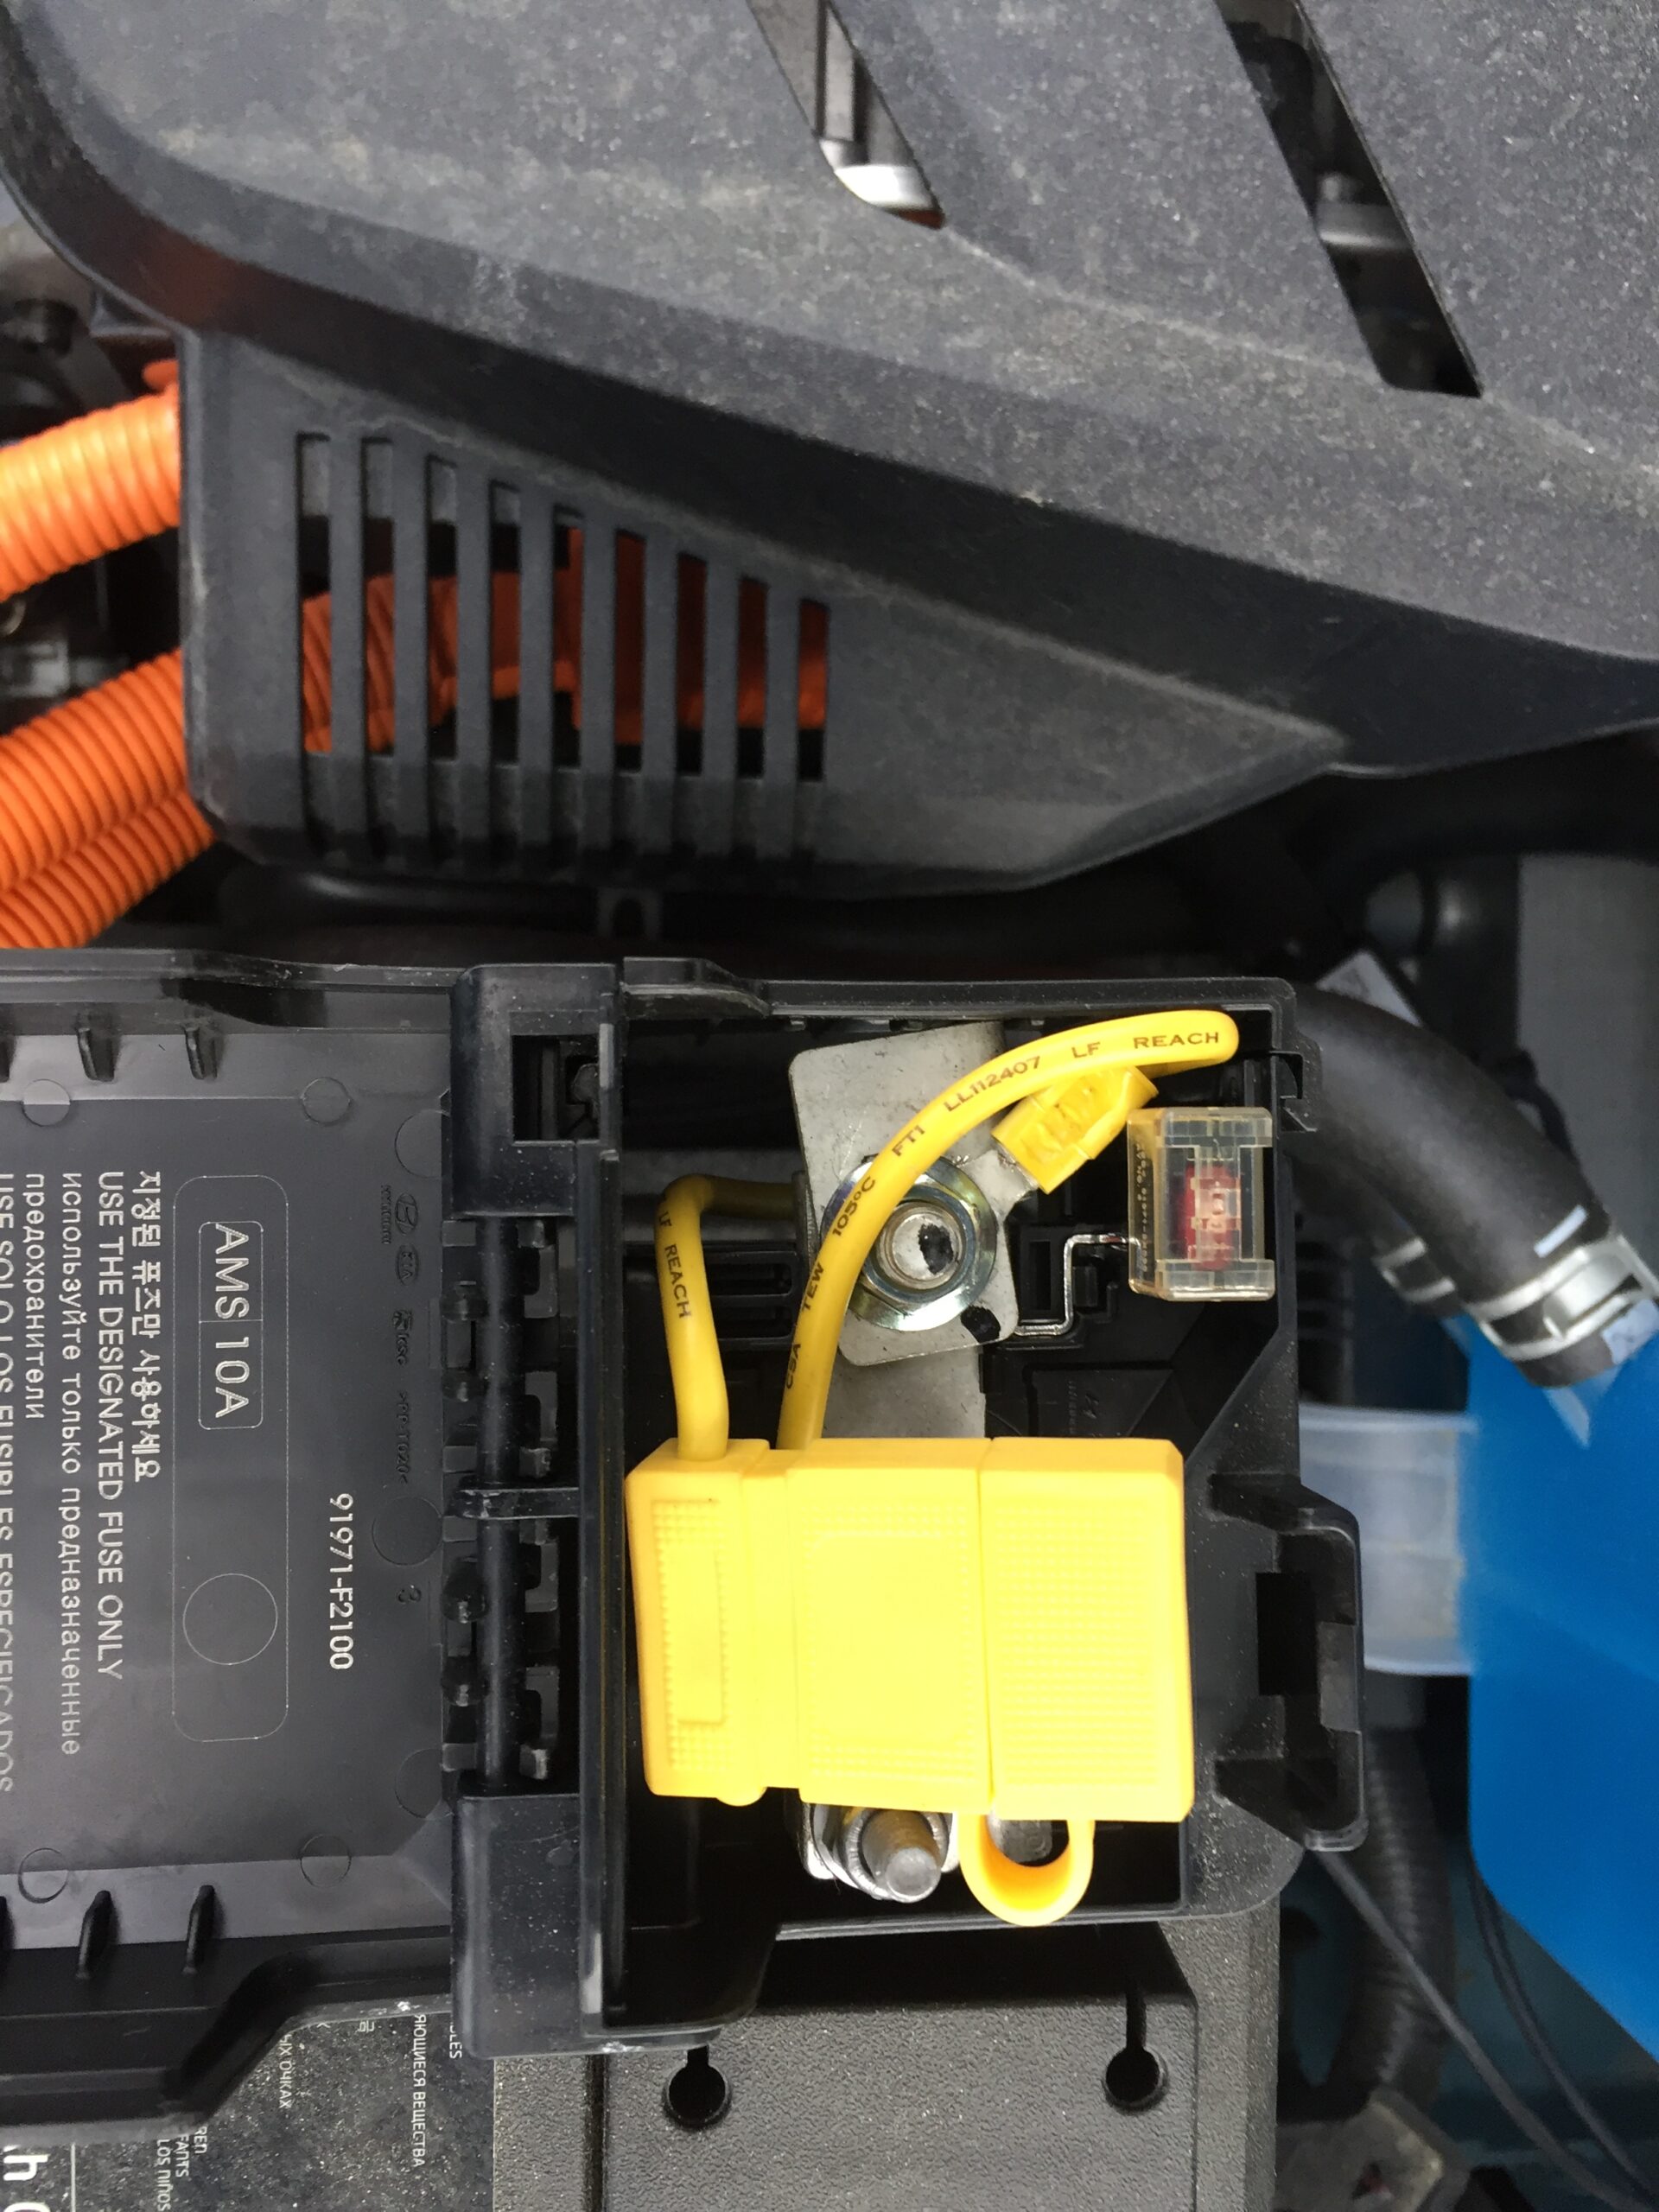
Now you can attach the yellow fuse connector to the HITCH battery wire and the positive KONA battery terminal.
We found there was enough room for the fuse to actually live underneath the cap of the battery terminal which is nice and neat but as I said before, you might want to attach the fuse outside the battery. As long as the yellow wire can reach up and to the terminal, you’re good.
Snip the yellow wire loop in the middle to make two ends.
Attach a butt connector to the HITCH end and to the HITCH grey battery cable.
Attach a ring terminal onto the other end of the yellow wire to go to the positive terminal on the battery.
Unscrew the positive battery nut and place the yellow ring onto it. Secure it.
Install the Fuse
Finally, once you’re sure all is ready to be tested, install the blue fuse from the kit into the yellow fuse holder and tuck it all away.
Done.
Final Testing
Now that the fuse is in, go ahead and turn the car on.
Use your 12V probe to test each of the female connectors on the wiring harness at the hitch. Each one should be its own blinker, tail, or brake light.
If they are all right, you’re all right! 🙂
Now just make sure everything is zip tied, secured, un-slackened and put back together.
Thankfully, it’s pretty easy to put the tail lights and all the plastic covers back in their spots.
I hope this proves to be helpful for everyone. And happy and safe trailering… remember… don’t tow too much! We don’t really know how much is too much. 🙂
A huge thank you to Al at the hitch shop (Exhaust Masters in Port Alberni, BC Canada) for installing the hitch so expertly and to my electrician friend Rob for his help with the fishing, pondering, and wiring. It was a fun day!
Happy Towing.
Cheers
Chris
PS – Thoughts on Car and Trailer Weights and Personal Maximums.
As far as how much I am actually willing to tow with this setup, I am going to try to be very conservative. The main reason for the trailer we got (Stirling 4×7 48-084-TDD) was not for capacity, but for length so that we could easily mount our aluminum canoe on it rather than having it way up high on the car, then having space for luggage and camping gear underneath leaving lots of room for the family in the car and light stuff in there, like our small but mighty dog.
I took inspiration for weight limits from this very detailed thedriven.io article from a 2019 Kona Electric owner in Australia.
My basic assumptions are:
- The trailer hitch adds 26 lbs / 12 kg
- The mount and ball likely weigh another 5 lbs / 2.2 kg
- The trailer’s unloaded weight is 400 lbs / 181 kg which, at 10% to the tow ball weight, should mean an unloaded tow ball weight of 40 lbs / 18 kg.
So with just the new equipment and trailer, I have added about 71 lbs / 32.2 kg to the rear of the vehicle.
- The trailer has a maximum GVWR of 1980 lbs / 898 kg.
- That means the trailer has a maximum tow ball weight (TBW) of 198 lbs / 89.9kg.
The Australian example is successfully pulling a Jayco camping trailer with tare weight of 1918 lbs / 870 kg. (TBW 192 lbs / 87 kg)
If I use that 1918 lbs / 870 kg as my absolute maximum towing capacity for my Stirling box utility trailer then that shaves off 62 lbs / 31 kg from the rated 1580 lbs / 716 kg trailer payload down to a trailer payload capacity of 1518 lbs / 688 kg.
To be conservative and gentle on the Kona Electric, and because I like round and metric numbers, I’ll cut that towing capacity further to a maximum towing payload of 650 kg or 1433 lbs.
Plenty for my modest purposes.
That makes my own maximum total trailer weight of 1833 lbs / 831 kg. Let’s cut that again to nice round, metric numbers for a final maximum total trailer weight (for me) of 800 kg / 1763 lbs. That’s a TBW of 80 kg / 176 lbs and final added load on the rear axle from loaded trailer and installed parts, before cargo inside the vehicle, of 207 lbs / 97 kg.
Update: Towed my first large load today! Took a load of dirt to the landfill.

I had the friendly folks at the landfill weigh the car and trailer before and after I unloaded. The results:
- Loaded with dirt: 2390kg / 5269lbs
- Dirt gone: 2030kg / 4475lbs
- Weight of dirt: 360kg / 793lbs
The weights check out considering the GVWR of the Kona Electric is 1685kg / 3715lbs, I’m 102kg / 225lbs, the trailer is 181kg / 400lbs unloaded and another 65kg or so for the hitch, some tools, and 2 sheets of plywood protecting the bottom of the trailer.
I did notice on the way to the landfill the electric economy was not as good as normal. I usually get 7-8km/kWh around town. I averaged 5.3km/kWh on the 8km trek to the landfill from my house. The car had absolutely no trouble pulling the load.
Replacing a faulty controller.
About a week after we installed the wiring harness and a few days after we subsequently got a new trailer, we noticed that the brake lights on the trailer were staying on even when the car was turned off and were on continuously while driving.
The right turn signal also got weak and didn’t flash as brightly or at all compared to the left. So clearly something had gone wrong. (The tail/running lights were normal).
In the end I determined that either there was something that caused the power controller to fail, or it simply failed on its own. I was unable to find any obvious faults with my troubleshooting below, so I have to lean to a bad power controller.
Troubleshooting: Ground first.
After some serious googling and consulting online with e-trailer.com and elsewhere I did a number checks before replacing the controller.
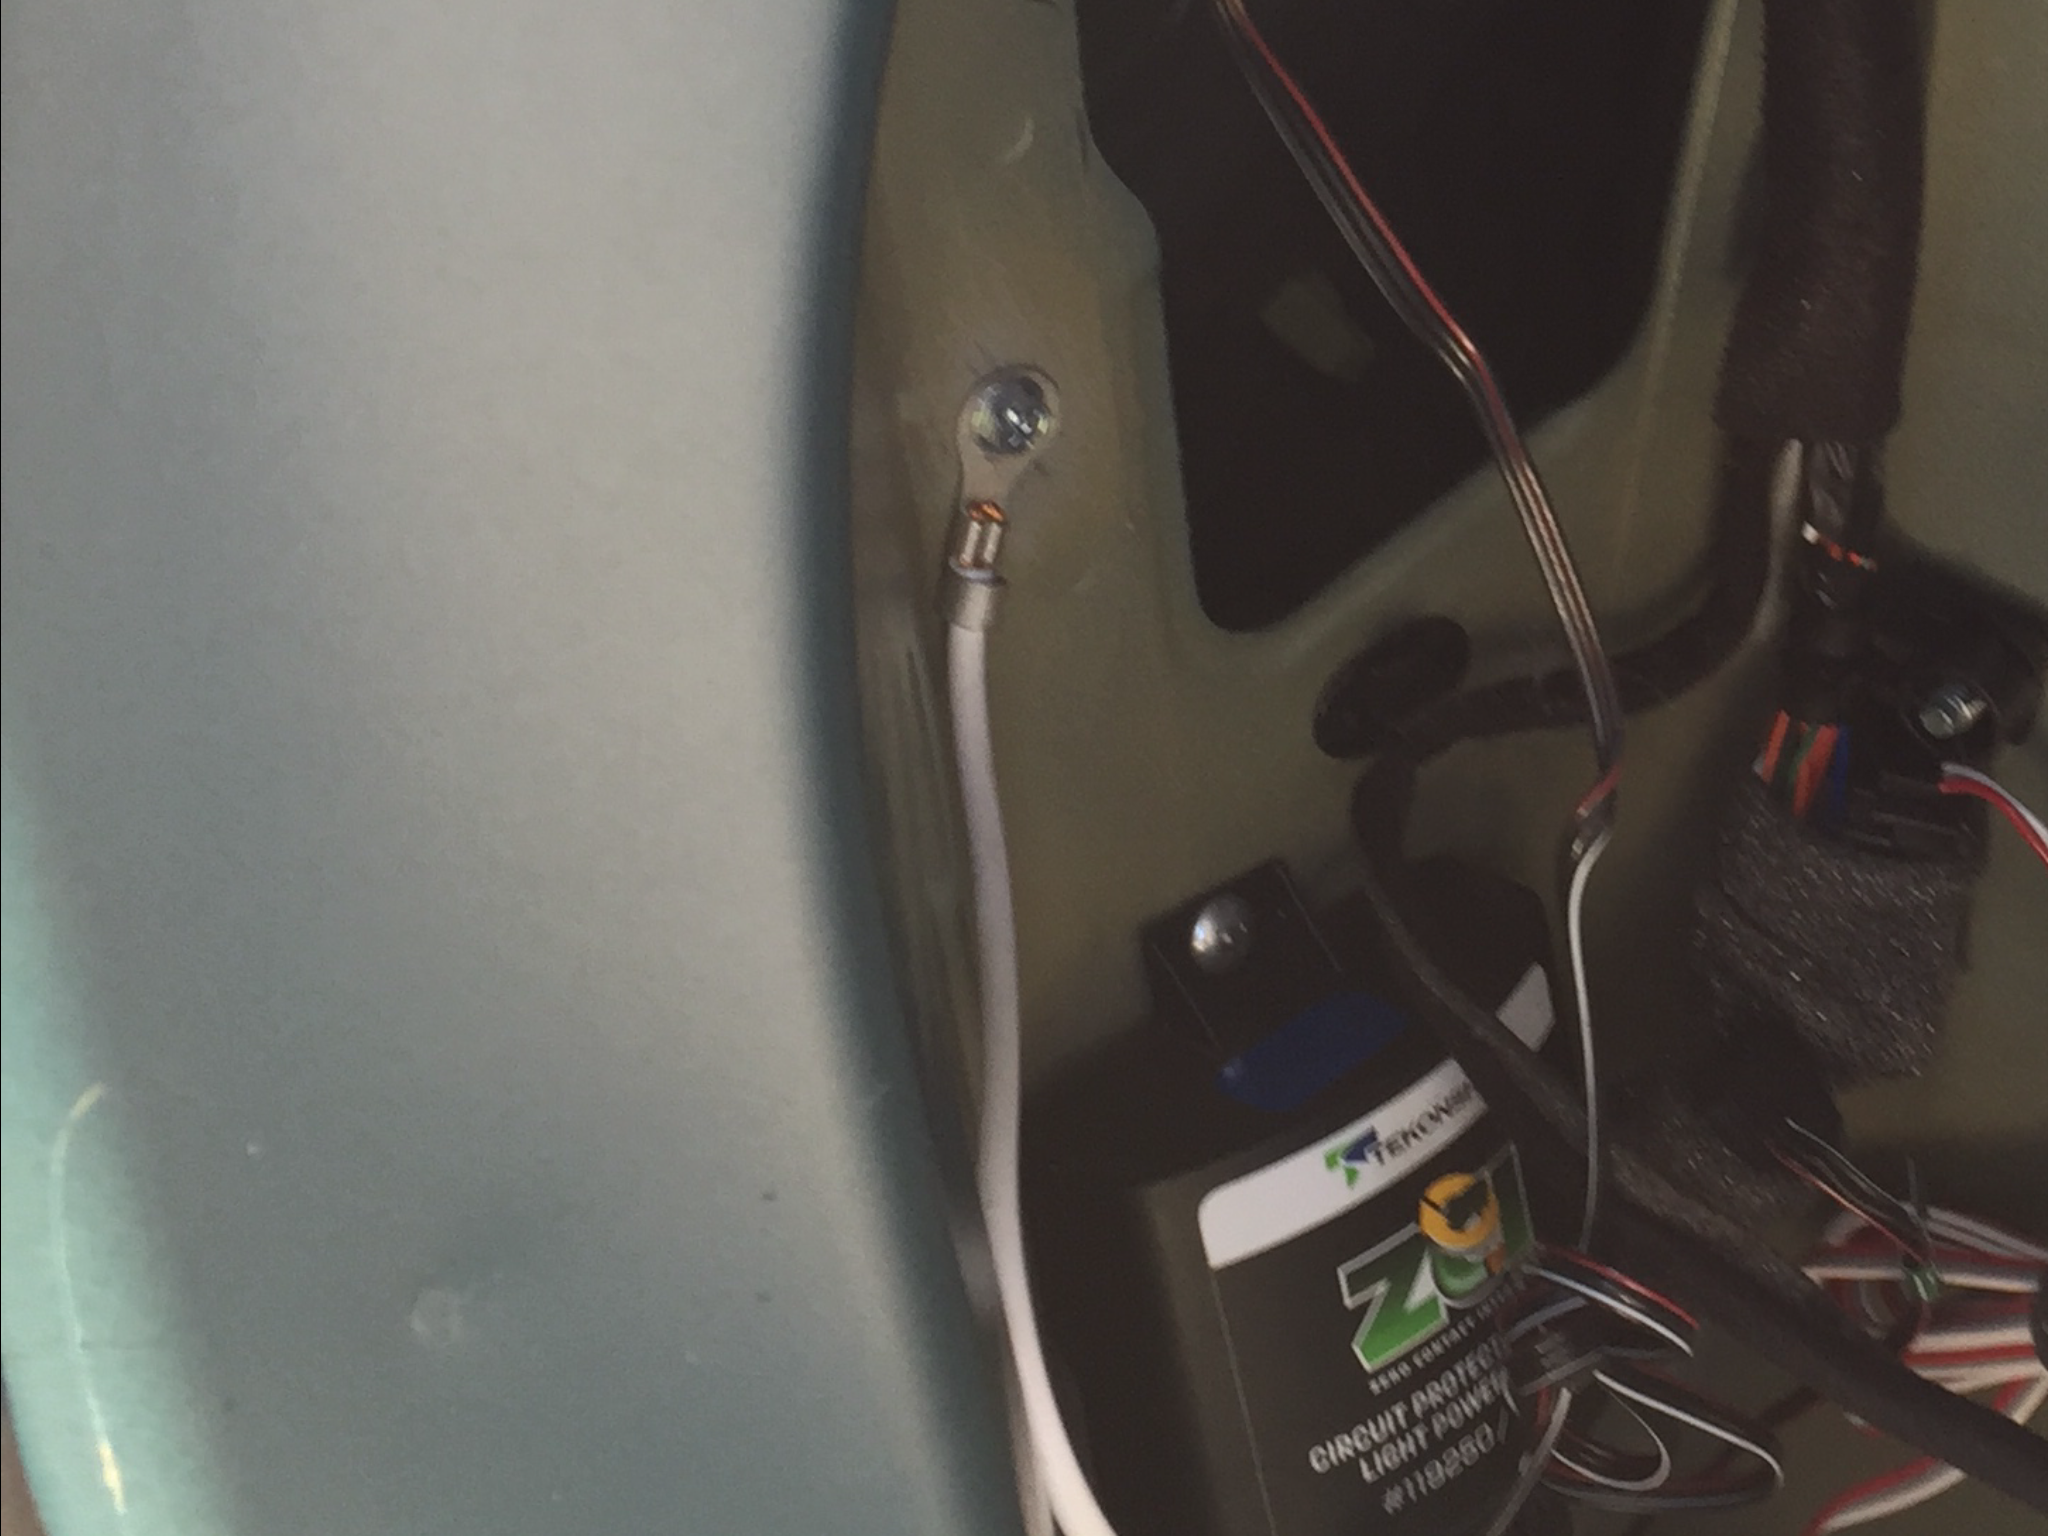
First, I checked and improved the ground on the car. It checked out but just in case, I moved it. I scraped the paint away from another area of the interior panel and screwed the ground in on its own just above the power converter.
Reset controller
While I was improving the ground, I also tried to reset the controller. In case it’s internal breakers had tripped and it might go back to normal. I removed the fuse from the battery line for 30 minutes while I fixed the ground (Which you should do anyway). Once I was done the ground, I reinserted the fuse and tried out the lights. No improvement. This was the first indication the controller had gone bad.
Trailer continuity
I also checked the continuity on all of the trailer lights. If there was a short or bad connection in the trailer this could cause problems. You do this by disconnecting the trailer from the car and using a multimeter (and an extension cord to bridge the distance) to test whether electricity can flow between the plug at the front of the trailer and each light. The extension cord just becomes an extension of the multimeter lead to complete the circuit. Put your multimeter to continuity mode (often a little light or sound wave icon on the dial) and you should get a beep or other display when the circuit is good. The new trailer checked out.
Just to be sure it wasn’t the trailer I also had my father in law come over with his Jeep and test the trailer lights. They worked as expected. This again indicated a problem on the car side. Either the controller itself, or ground, or a short.
Changing trailer lights to LED.
The last thing I did on the trailer side of things was to change all the light fixtures to LED. Stirling trailers has a pack with all the LED lights and I had already ordered them before the wiring harness went bad.
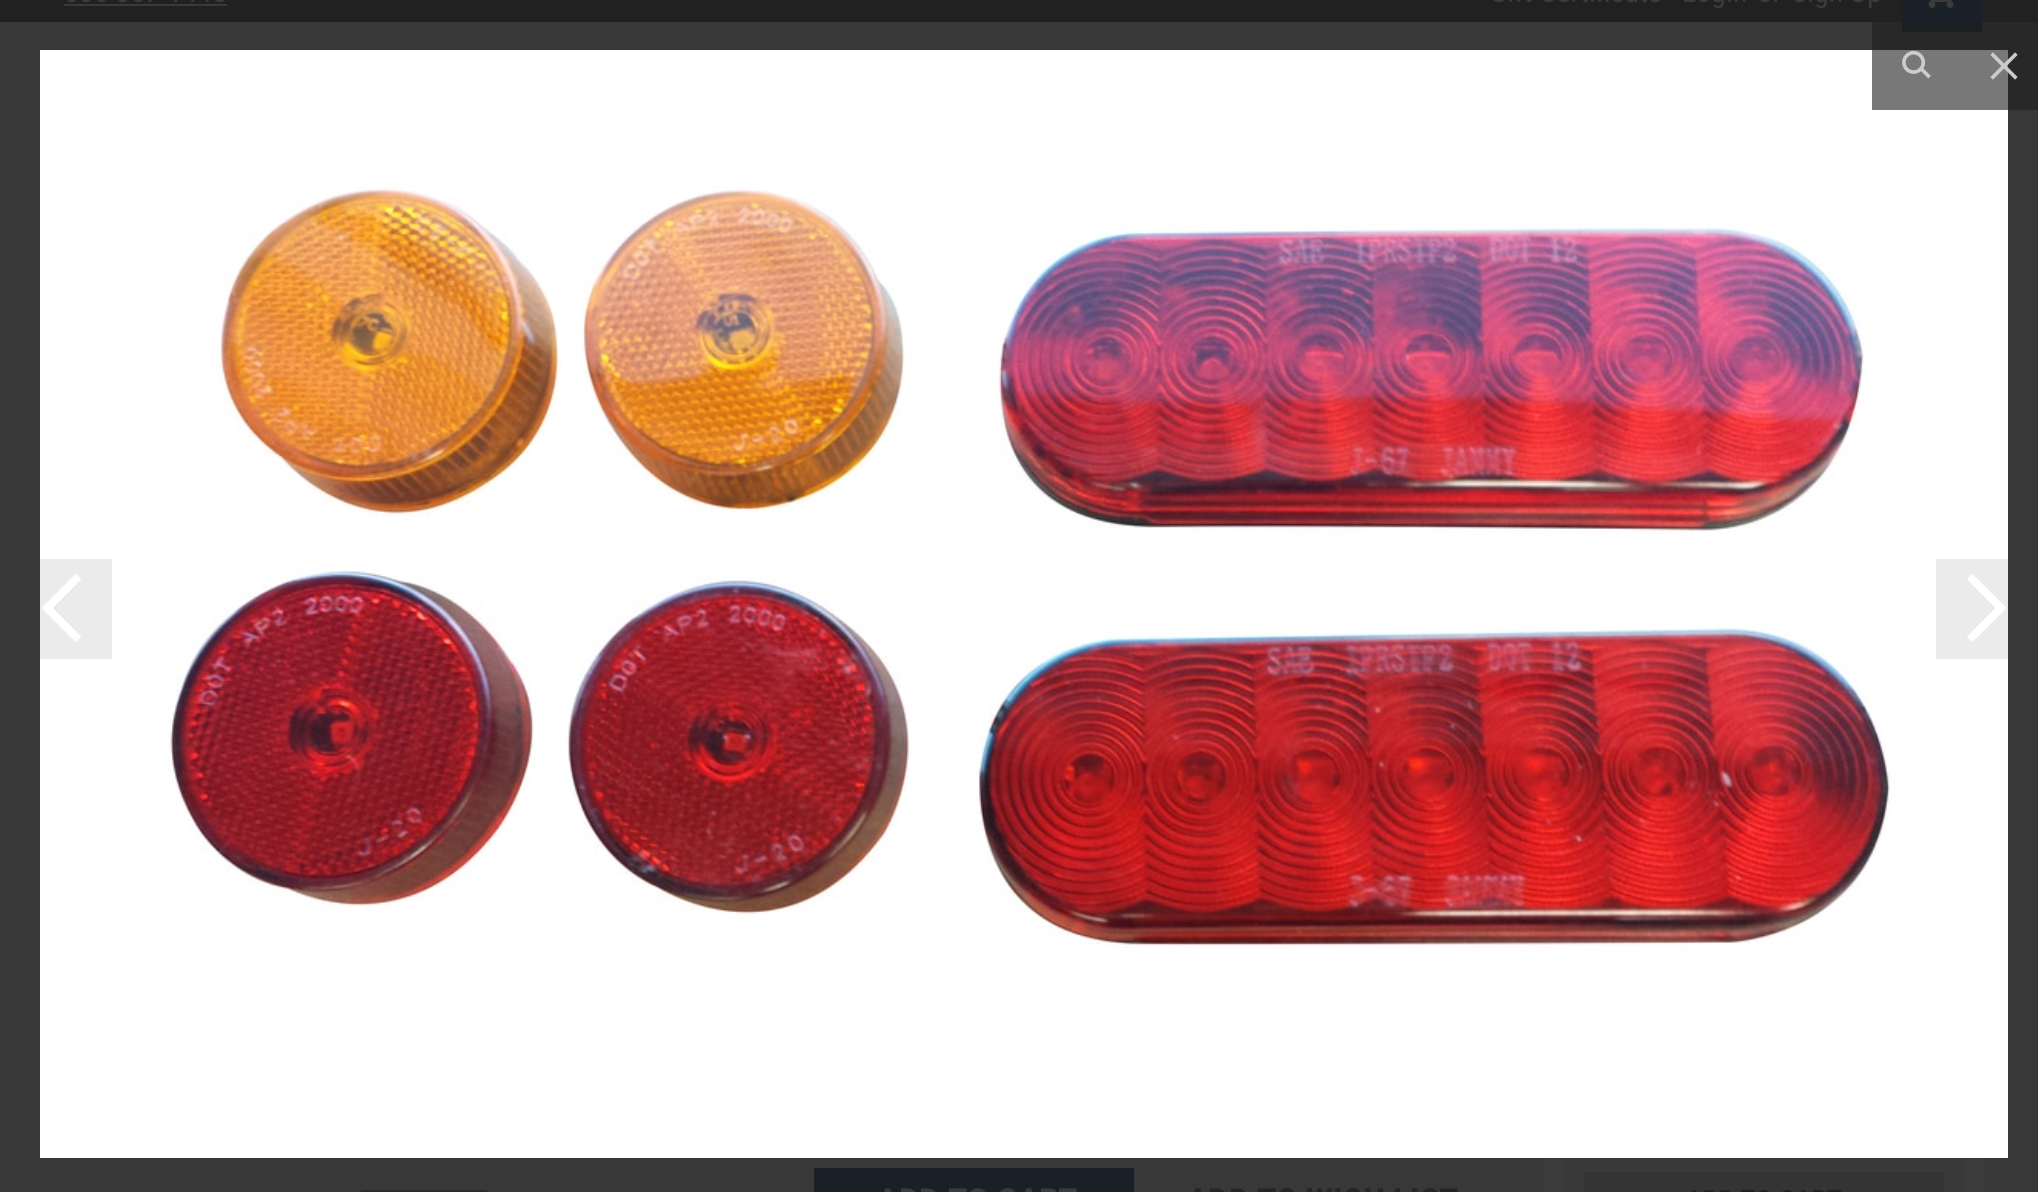
I read in a few places that the controller could get overloaded by the power draw of the trailer lights. LEDs draw far less, and they go with the Electric Car aesthetic anyway, so I installed them to take that possibility out of the equation. I don’t have a before and after amperage load for the lights.
Check car for shorts or phantom voltage.
The last thing to do to eliminate the KONA from being the culprit was to test each lead from the controller to the car wiring for any voltage while the car was off.
None of the taps or wires from the car to the controller showed any voltage. The voltage was only coming from the 4pin harness. This was the final indication that the power controller had failed.
Replacing with a new ZCI Tekonsha wiring harness power controller
Time was short, as I have a camping trip coming! So after fretting for a bit on how to replace the failed wiring harness, I decided to go with the expensive, but intriguingly simple, “Zero Contact Interface†(ZCI) Universal Modulite from Tekonsha.
I chose it primarily because it was readily available at a local hardware store (it is also all over Walmart, Amazon, etc) and it removed the need for splicing/tapping the car wires.

Installation is identical as previously described except instead of the little blue “scotchlock†tap locks to tap into each wire, this rig has little induction clamps that fit around each wire. No tampering with wires!
Magnets in the clamps sense the current in the wire and that is enough for the controller to activate the trailer lights. Upon testing, we noticed about a half second delay from initiation of brake or tail lights on the car to same on the trailer.
Installing the clamps is both easier, and more difficult. Easier because you don’t have to wonder whether the taps made a good connection. But more difficult because the clamps are quite bulky and the wires are small, and tightly packed together in their harness. You will want to give yourself as much exposed harness as you can so you have room for the clamps.
Below is how the wires lay in the clamp. This is pretty optimistic with a vehicle wire bundle as tightly packed as the KONA’s. The correct single wire must go through the magnetic part to work and the magnet end must be pointed toward the vehicle lights on the wire.

Here are some pictures of the clamps, after installation plus the foam wrapping they give you to fully secure the wire in the clamp. Bulky, but definitely not moving!
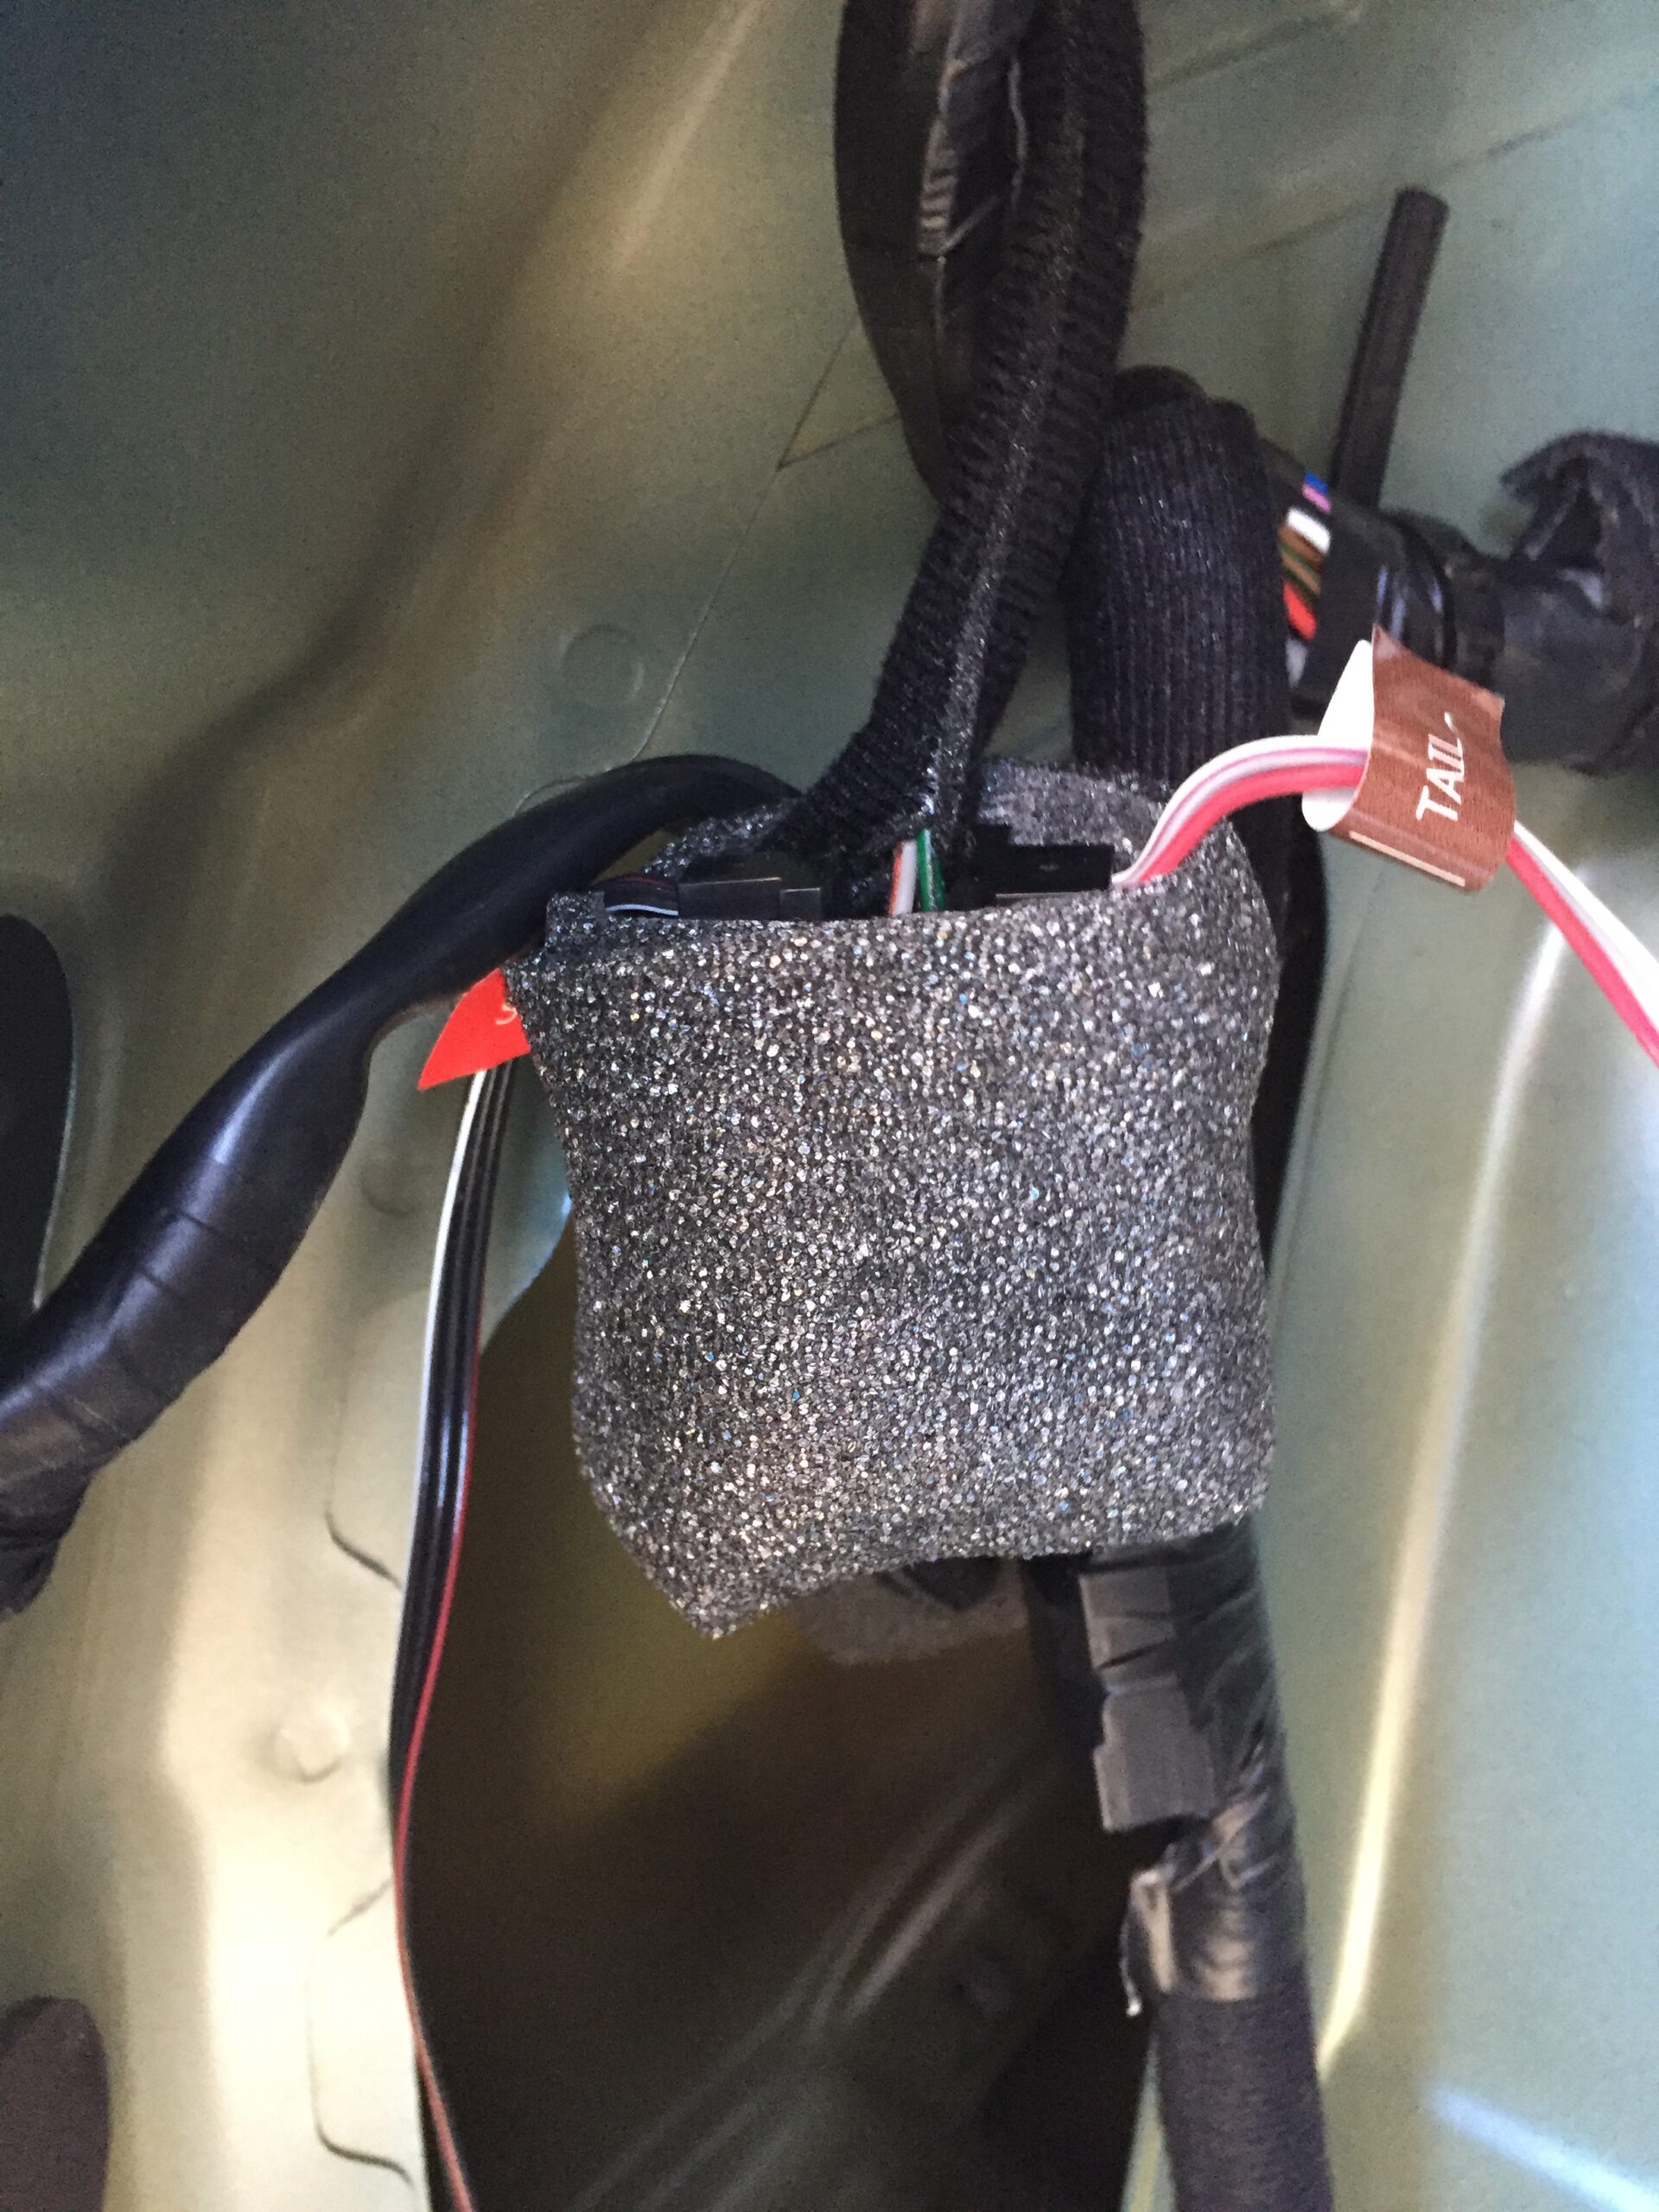

As you can see it is plenty bulky, but secure. Below is the finished install minus some final zip ties. The ZCI kit has very long leads for the light sensors. You could easily mount the power controller under the car inside the plastic rear bottom panel where the 4pin plug goes to the hitch and have ample length to get up into the rear trunk area but we chose to go with the same layout.
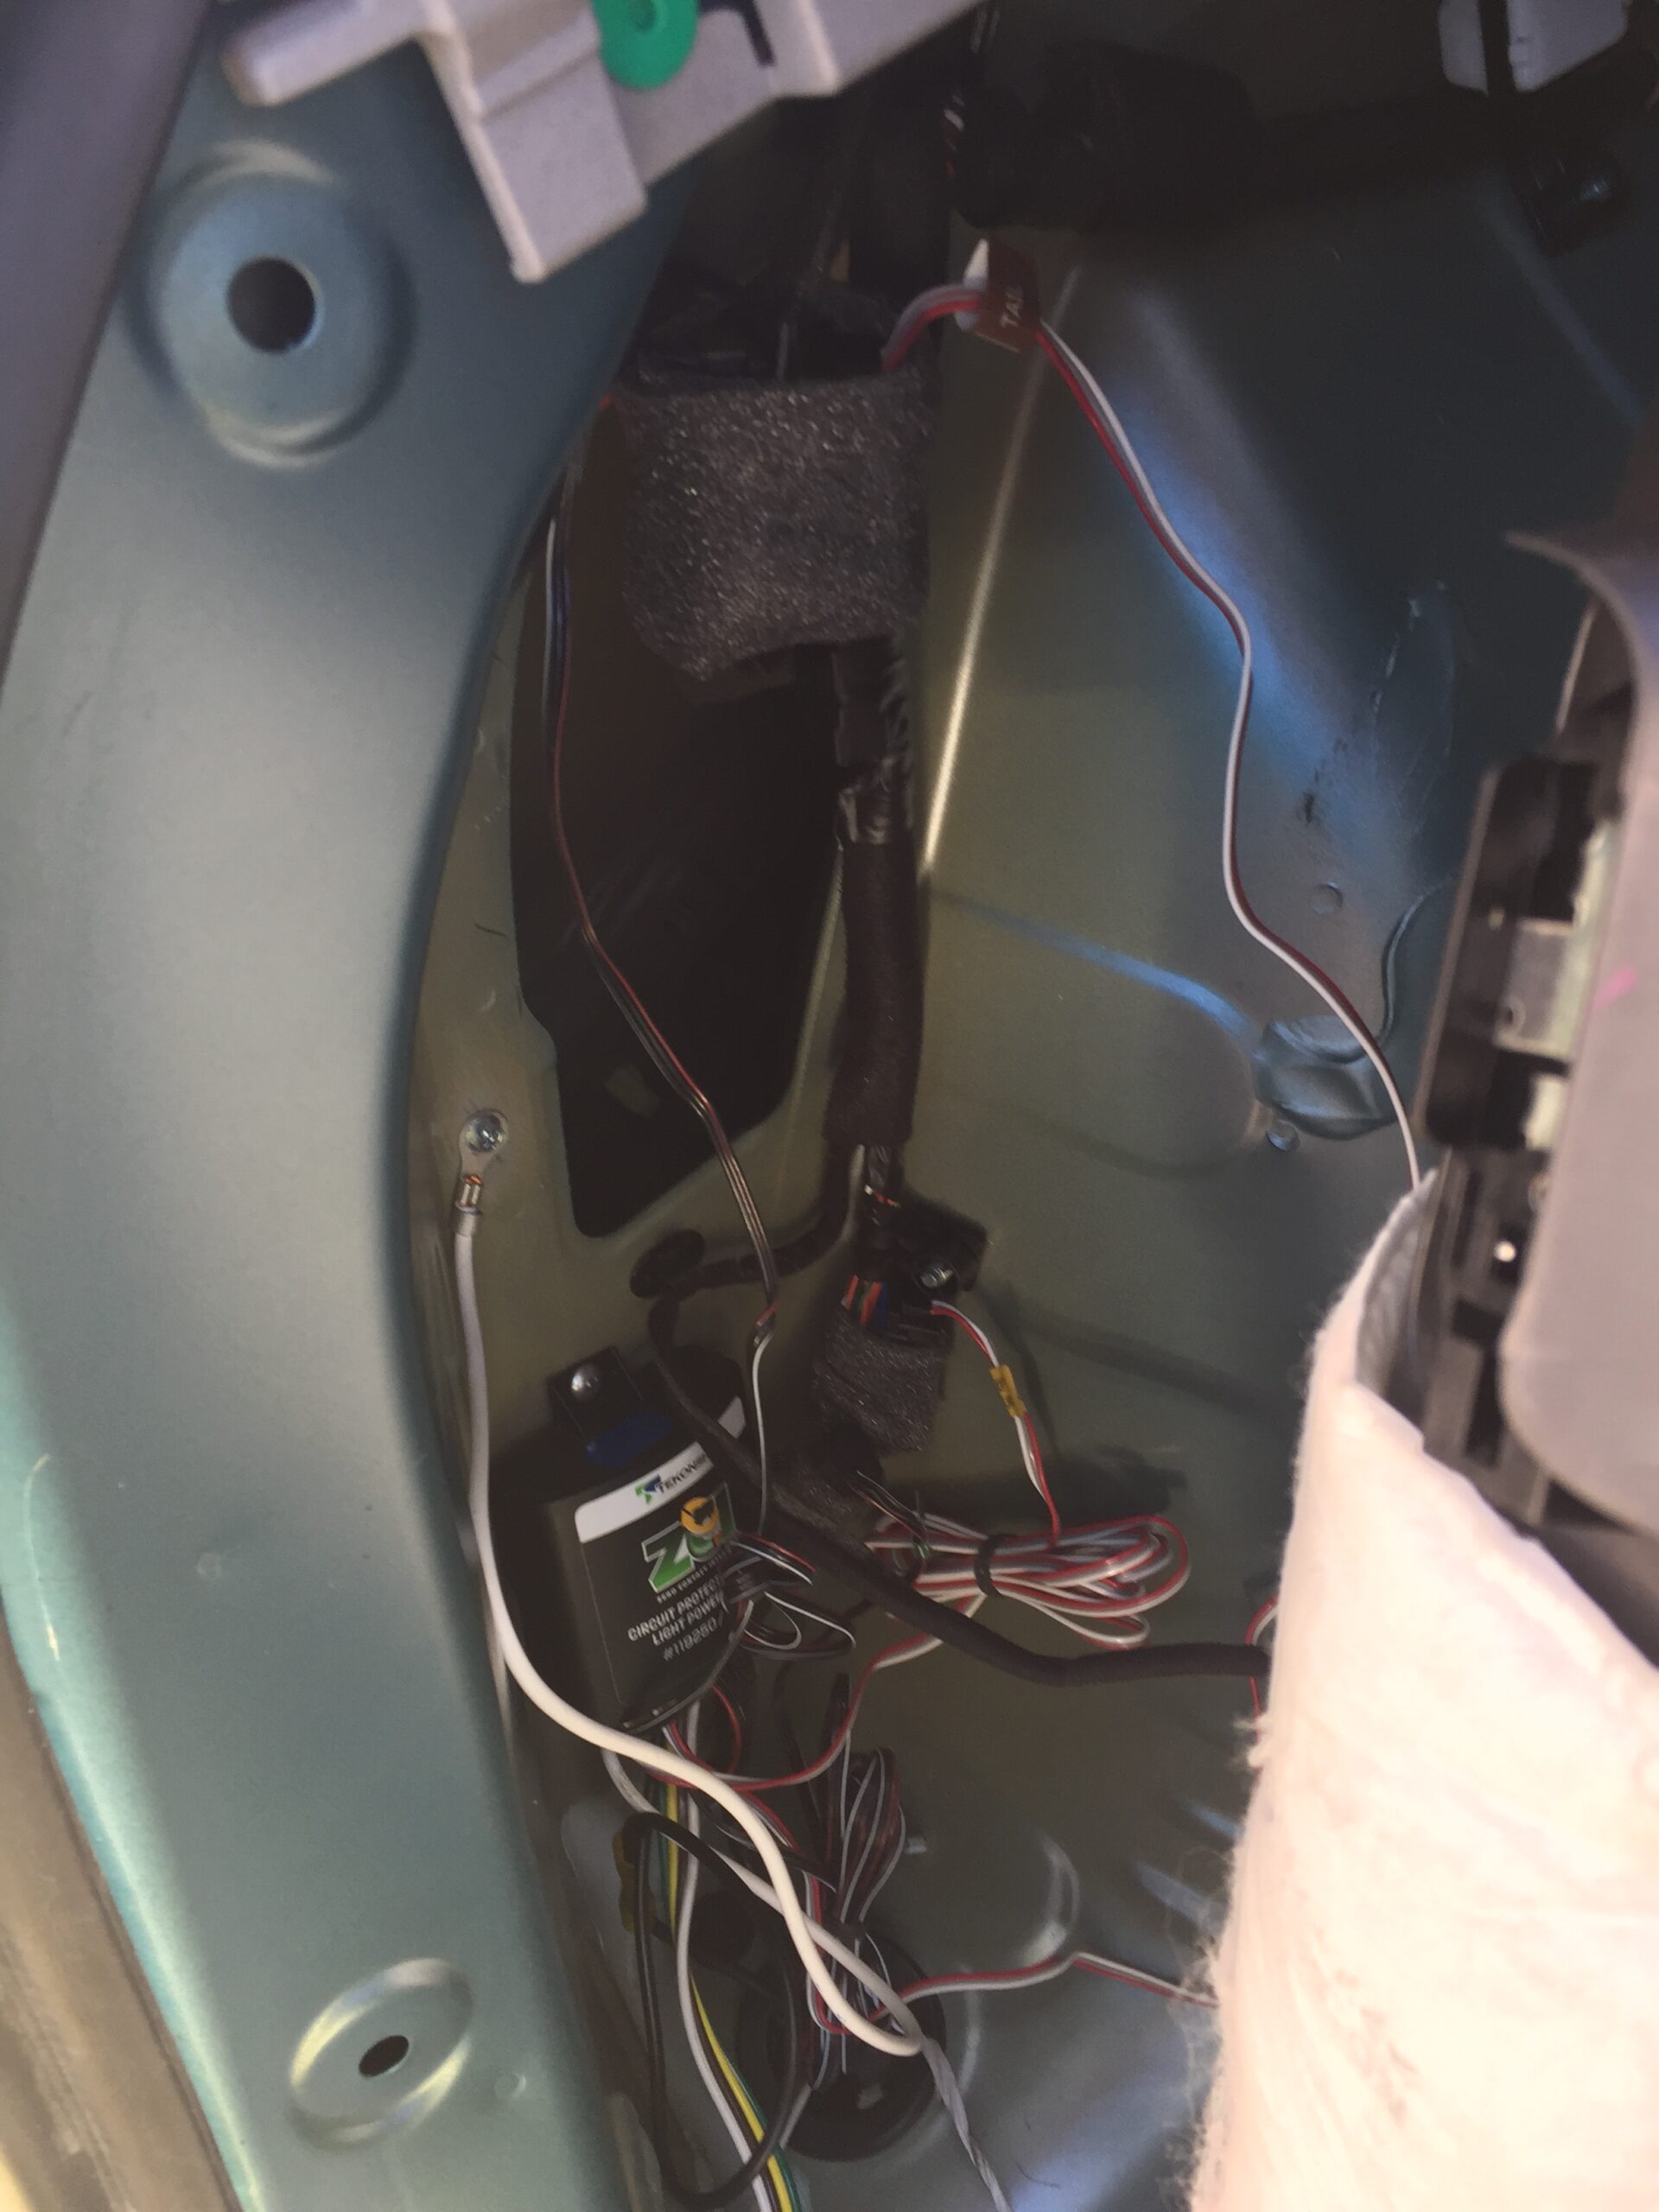
That’s it for the install of the ZCI controller. We just connected the ground and the battery wire (using the battery wire from the other controller) and were ready to test.
The ZCI instructions indicate you should test each function individually for 5 seconds so the controller can “learn†your lights.
We did this and were successful on the first try!
The trailer is all happy again, time to go canoeing! I hope you found this article useful. 🙂
